When your canvas awning needs a little TLC, knowing what you can fix yourself versus when to call for help is key. Here are the main points to remember for keeping your awning in good shape.
Key Takeaways
- Always understand your awning’s type and how it works before starting any repair.
- Safety first! Use proper ladder techniques and never work in high winds.
- Small fabric tears can often be patched with repair kits or by sewing.
- Check hardware like bolts and brackets regularly for looseness or damage.
- Know when a problem is too big for DIY and call a professional for safety and complex issues.
Understanding Your Awning System Before Repairs
Before you even think about grabbing a wrench or a needle and thread, it’s super important to get a good handle on what you’re actually working with. Trying to fix something without knowing how it works is like trying to bake a cake without a recipe – messy and usually ends in disappointment. So, let’s break down what you need to know about your awning system before we get into the nitty-gritty of repairs.
Identify Your Awning Type and Components
First off, what kind of awning do you have? Is it a manual crank-out, a motorized one that hums to life with the push of a button, or maybe a spring-loaded model? Each type has its own quirks and specific parts. For retractable awnings, you’ll typically find a roller tube where the fabric winds up, support arms that extend and hold everything in place, the fabric itself, and brackets that attach it all to your house. If it’s motorized, there’s a motor and a control system in the mix too. Knowing these parts is key. You can often find diagrams in your owner’s manual, or sometimes manufacturers have detailed breakdowns on their websites. For RV owners, understanding the specific RV awning components is just as vital.
Review Your Owner’s Manual
Seriously, don’t toss that manual! It’s your best friend when it comes to understanding your specific awning model. It usually has detailed diagrams of all the parts, explains how everything is supposed to work, and often includes troubleshooting tips or basic maintenance advice. It’s the manufacturer’s way of telling you exactly what you need to know. If you can’t find the physical copy, a quick search on the manufacturer’s website using your awning’s model number might just save the day.
Familiarize Yourself With Operation
Take your awning for a spin – extend it fully, retract it, and pay attention. Does it move smoothly? Are there any weird noises, like grinding or squeaking? Does one side seem to lag behind the other? Noticing these things now, before a problem gets worse, is a huge advantage. Understanding its normal operation helps you spot when something is off. It’s like knowing your car’s engine sound; you can tell when it’s not quite right. This initial check helps you pinpoint potential issues and makes the repair process much more targeted. For those with retractable awnings, understanding the basic parts and function is a great starting point.
Essential Tools and Safety Precautions
Before you even think about grabbing a wrench or a patch kit, let’s talk about what you’ll need and, more importantly, how to stay safe. Trying to fix your awning without the right gear or a solid safety plan is just asking for trouble. You don’t want to end up with a damaged awning and a trip to the emergency room, right?
Gather Your Awning Repair Toolkit
Having the right tools makes all the difference. It turns a frustrating ordeal into a manageable task. Here’s a rundown of what you should have on hand for most common awning repairs:
- Basic Hand Tools: A good set of screwdrivers (Phillips and flathead), adjustable wrenches, pliers, and a measuring tape are your bread and butter.
- Power Tools: A cordless drill with various bits can speed up tasks like tightening or replacing screws and bolts.
- Fabric Repair Supplies: Heavy-duty outdoor thread, strong canvas needles, fabric scissors, and specialized awning repair tape or patches are a must for fabric issues.
- Cleaning Supplies: Mild soap, water, and soft brushes are needed for cleaning before and after repairs. Check out how to clean canvas awnings for tips.
- Ladder: A sturdy, stable ladder is non-negotiable for reaching higher parts of your awning.
Prioritize Safety at Heights
Working on an awning, especially a retractable one, often means working off the ground. This is where safety really comes into play. Always have a spotter when you’re on a ladder or working at height. They can stabilize the ladder, hand you tools, and call for help if needed.
- Ladder Safety: Ensure your ladder is on firm, level ground. Never overreach; move the ladder instead. Inspect the ladder for damage before each use.
- Weather Conditions: Avoid repairs on windy days. Even a slight breeze can make a ladder unstable or cause the awning to move unexpectedly.
- Eye Protection: Always wear safety glasses. Small parts can fly off, and debris can fall. Consider other safety gear like gloves or hearing protection if needed.
Working at heights requires a clear head and a steady hand. If you feel unsteady or unsure about your footing, it’s better to stop and reassess the situation. Sometimes, a simple adjustment to your position or a different approach can make all the difference in staying safe.
Know When to Call a Professional
Let’s be honest, not every repair is a DIY job. Some issues are beyond the scope of a typical homeowner’s toolkit or comfort level. If you’re dealing with complex electrical problems on a motorized awning, significant structural damage, or if the repair requires specialized equipment you don’t have, it’s time to bring in the pros. Trying to force a repair you’re not equipped for can lead to more damage and potentially dangerous situations. It’s always better to pay for professional service than to risk injury or a more costly repair down the line.
Addressing Common Fabric Damage
Fabric issues are probably the most common thing you’ll run into with an awning. Little tears, holes, or even just general wear and tear can make your awning look pretty sad, and sometimes, it can even affect how well it works. The good news is, a lot of these fabric problems are totally fixable without calling in the cavalry.
Repairing Small Tears and Pinholes
For those annoying little snags or tiny holes, you’ve got a couple of good options. Canvas repair tape is a lifesaver for quick fixes. It’s usually pretty strong and designed to stick well outdoors. You’ll want to clean the area really well first, like, make sure it’s totally dry and free of dirt. Then, just cut a piece of tape a bit bigger than the hole, round off the corners so it doesn’t peel up easily, and stick it on. Some people like to put a piece on both sides for extra strength. It’s a pretty simple process, and for small stuff, it holds up surprisingly well. You can find this kind of tape at most hardware stores, and it’s way cheaper than replacing the whole fabric.
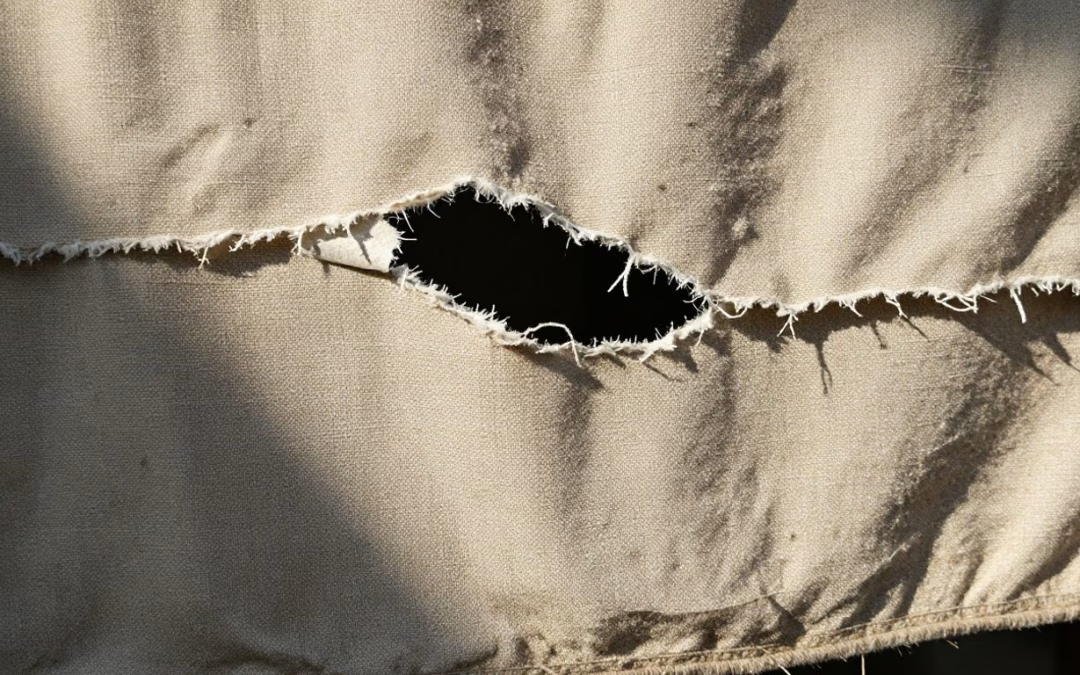
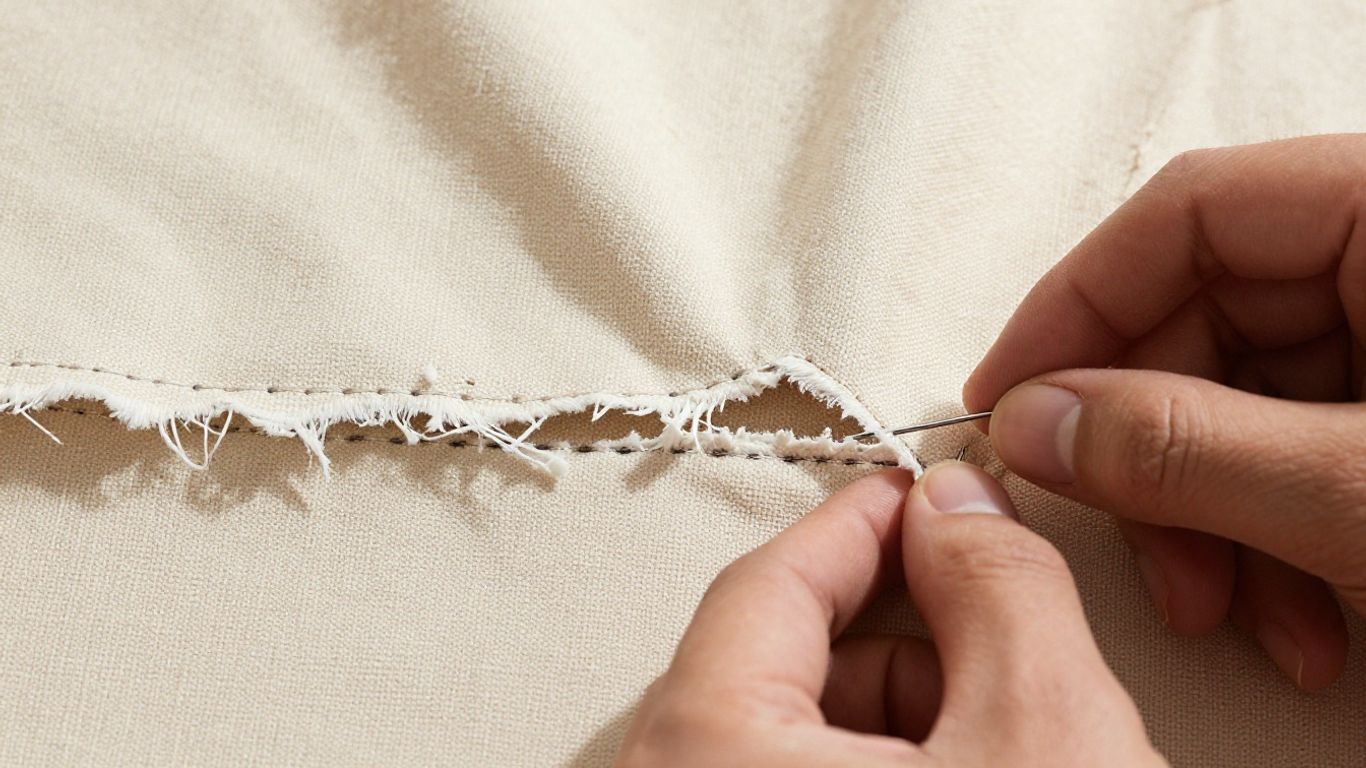
Patching Larger Rips and Slits
When you’re dealing with something bigger than a pinprick, like a rip that’s a few inches long, you’ll probably want to go with a patch and stitch method. First, clean the area and trim any really frayed edges to make it neat. Then, get yourself a piece of matching or similar outdoor fabric. You’ll use a strong fabric adhesive – make sure it’s one made for outdoor fabrics and awnings – to glue the patch down. Once that’s set, you’ll want to stitch around the edges of the patch. Use a heavy-duty needle and thread that’s meant for outdoor use, like UV-resistant polyester. Small, even stitches are best here; you don’t want to create new stress points.
Here’s a quick rundown:
- Clean the area: Make sure it’s spotless and dry.
- Cut your patch: Make it larger than the rip on all sides.
- Apply adhesive: Use a good quality outdoor fabric glue.
- Stitch it up: Use strong, outdoor-rated thread and a sturdy needle.
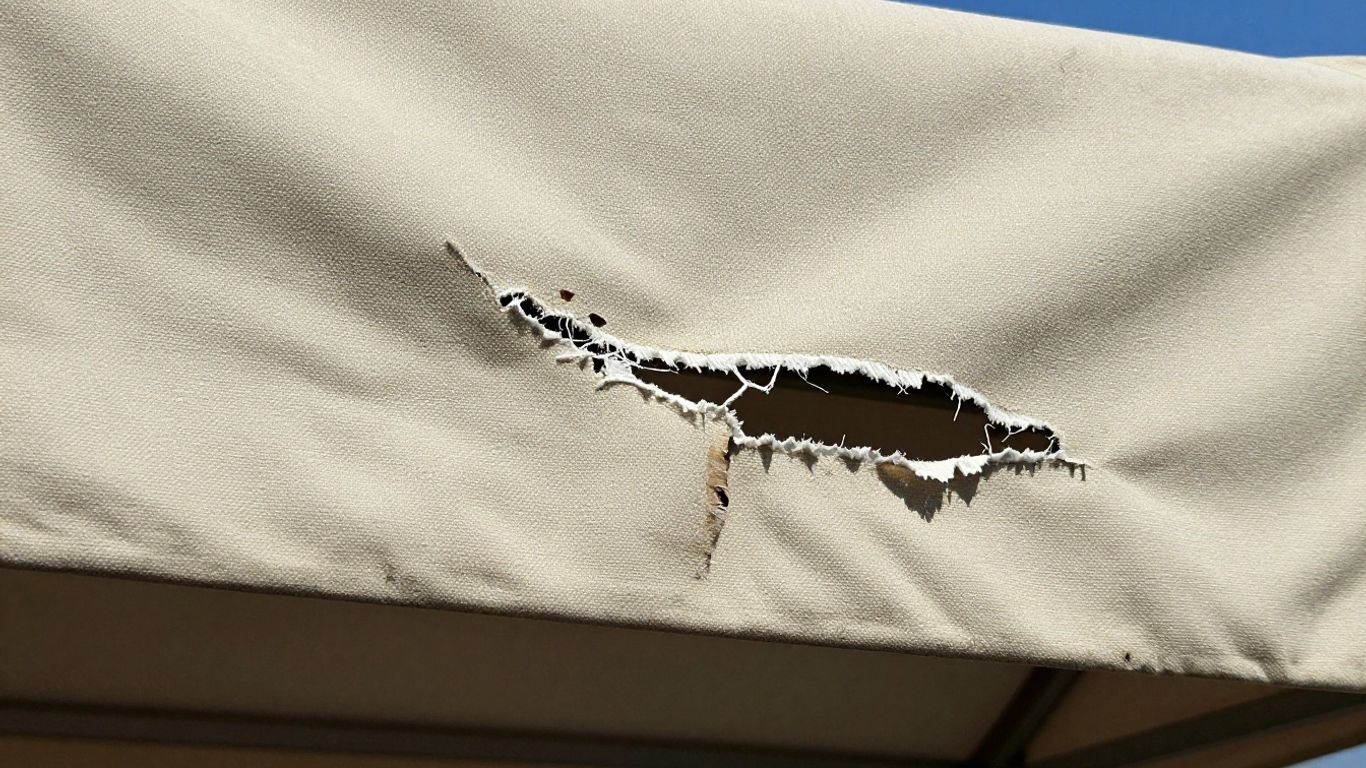
Identifying Repairable vs. Non-Repairable Fabric
So, how do you know if it’s worth fixing yourself? Generally, small tears, holes under about six inches, or minor seam issues are good candidates for DIY repair. If the fabric around the tear feels strong and flexible, that’s a good sign. However, if you’ve got really big rips, fabric that’s become brittle and faded from the sun, or damage that’s right on a major stress point, it might be time to call in a pro. Trying to patch up something that’s too far gone could actually make it worse or even be a safety hazard. It’s always better to be safe than sorry, right? If you’re unsure, getting a professional opinion is a smart move, and they can often tell you if a repair is even possible. Sometimes, a professional can even replace just the fabric panel, which is less expensive than a whole new awning.
When you’re looking at fabric damage, don’t just focus on the hole itself. Check the fabric all around it. Is it stiff? Does it feel like it might tear easily if you pull on it? If the surrounding material is still in good shape, your repair has a much better chance of holding up. If the whole area is weak, it might be a sign that the fabric is just too old and needs replacing.
For really tough tears, products like Tear-Aid are designed to handle a lot of stress and are a good option for patching.
Fixing Frame and Hardware Issues
Sometimes, the fabric is fine, but the bones of your awning are acting up. That’s where frame and hardware repairs come in. These aren’t usually the most glamorous fixes, but they’re super important for keeping your awning working right and, honestly, for keeping it from falling off your house.
Inspecting for Loose or Damaged Hardware
First things first, give all the nuts, bolts, and screws a good once-over. You’d be surprised how often things just loosen up over time from the awning moving in the wind. Grab your toolkit and systematically check every connection point, especially where the awning attaches to your home. Loose hardware is a common culprit for squeaks and general instability. If you find something wobbly, tighten it up. Just be careful not to crank down too hard, or you might strip the threads or even crack the mounting surface. If a screw just spins and won’t tighten, you might need to replace it with a slightly bigger one or look into repairing the hole itself.
Resolving Squeaking and Grinding Noises
That awful squeaking or grinding sound when you extend or retract your awning? It’s usually the moving parts crying out for some attention. Think of the pivot points, hinges, and any other bits that slide or rotate. A good cleaning followed by some lubrication can work wonders. You’ll want to use a marine-grade grease or a spray lubricant made for outdoor use. Don’t just grab any old oil from the garage; those can attract dirt and make things worse down the line. Wipe away the old gunk and grime before you apply the new stuff for the best results. This simple step can make your awning operate much more smoothly and quietly, and it’s a great way to prevent more serious wear and tear on the awning arm components.
Addressing Bent or Misaligned Arms
Bent or misaligned arms are a bit more serious than just loose screws. This often happens if the awning has been hit by something or subjected to strong winds. If an arm looks bent, it can cause the awning to extend unevenly, put stress on the fabric, and make operation difficult. Sometimes, minor bends can be carefully straightened, but if an arm is significantly damaged, it might need to be replaced. Misalignment can also occur if the mounting points have shifted. You’ll want to check if both arms extend to the same position when the awning is fully out. If one is further out or shorter than the other, it’s a sign that adjustments are needed. Getting these arms lined up correctly is key to even awning wear and proper function.
Dealing with frame and hardware issues might seem daunting, but many of these problems are quite manageable with the right approach. Regular checks and prompt attention to small issues can prevent them from snowballing into bigger, more expensive repairs. It’s all about staying on top of the maintenance.
Here’s a quick rundown of what to look for:
- Loose Fasteners: Check screws, bolts, and nuts at all connection points.
- Worn Pivot Points: Look for play or excessive movement in hinges and joints.
- Corrosion/Rust: Inspect metal parts for signs of rust, which can weaken components.
- Bent or Twisted Metal: Visually check arms and brackets for any deformation.
- Lubrication Needs: Identify areas that look dry or are making noise.
Maintaining Awning Alignment and Performance
Keeping your awning looking good and working right is mostly about paying attention to how it sits and moves. When an awning isn’t lined up properly, it can cause all sorts of headaches, from fabric wearing out too fast to the whole thing just not working smoothly. It’s not just about looks; it’s about making sure your awning lasts as long as it should.
Correcting Alignment for Even Wear
Think of alignment like making sure both sides of your car’s tires are wearing down evenly. If one side is off, you get problems. The same goes for your awning. When it extends and retracts unevenly, certain parts get stressed more than others. This can lead to tears, stretched fabric, or even damage to the arms and motor if you have one. You might notice this if one side of the awning seems to come out further than the other, or if it feels like it’s catching on something when you operate it. Proper alignment helps distribute the stress evenly across the entire awning system.
To check alignment, extend the awning all the way out. You want the front edge to be pretty much parallel to your house. Also, check that both support arms are extended to the same point. A small difference, maybe an inch or two, is usually okay, but if one side is way out, it’s time to make some adjustments. You might need to tweak how the arms are mounted or use any adjustment screws built into the arms themselves. It takes a bit of patience, but small changes can make a big difference. If you’re unsure about how your particular model adjusts, checking the manufacturer’s instructions or looking up your specific model online can be a big help.
Testing Adjustments for Proper Drainage
Getting the pitch right is super important, especially if you get a lot of rain. The ideal angle, usually between 14 and 20 degrees, lets water run off without sitting on the fabric. If the pitch is too flat, water can pool up, causing the fabric to sag and potentially stretch or even tear over time. Too much pitch, and you lose some of your shaded area, plus it can put extra strain on the mounting hardware.
After you’ve made any adjustments to the pitch, give it a test run. The easiest way is to grab a garden hose and spray the awning like you’re having a mini car wash. Watch where the water goes. It should all flow off the front edge. If you see puddles forming anywhere on the fabric, you’ll need to adjust the pitch a bit more. You can usually change the pitch by adjusting the support arms. Most systems have screws or bolts on the arms that let you raise or lower the front edge. Just remember to make the same adjustment on both sides so you don’t mess up the alignment you just fixed!
Ensuring Smooth Extension and Retraction
Beyond just looking right and draining well, you want your awning to operate without any fuss. This means it should extend and retract smoothly, without any weird noises or feeling like it’s fighting you. If you hear grinding, squeaking, or if it stops and starts unexpectedly, there’s likely an issue.
Sometimes, a bit of lubrication on the moving parts can solve squeaking noises. Check your owner’s manual to see what kind of lubricant is recommended. For more serious issues, like binding or a motor that sounds strained, it might be time to look into the internal mechanisms. This is where things can get a bit more complicated, and if you’re not comfortable with mechanical repairs, it’s often best to get help. For example, if you have an electric awning, issues with the motor or wiring might need a professional touch, and you can find some general tips on electric RV awning maintenance.
A well-maintained awning not only looks better but also performs its job of providing shade and protection more effectively. Regular checks and minor adjustments can prevent small problems from turning into costly repairs down the line. Don’t underestimate the power of keeping things lined up and moving freely.
When Professional Assistance Is Necessary
Look, sometimes you just gotta know when to call in the cavalry. While a lot of awning upkeep is totally doable yourself – like patching a small tear or tightening a loose bolt – there are definitely times when messing around could lead to more problems, or worse, a safety hazard. It’s not about admitting defeat; it’s about being smart with your time and your awning’s lifespan.
Electrical and Motorized System Repairs
If your awning is the fancy, motorized kind, and it starts acting up, you’ll probably want to step away from the toolbox. Messing with the motor, the wiring, or the remote control system is best left to folks who actually know what they’re doing. Trying to fix electrical issues yourself can be dangerous and might void any warranty you have. It’s usually not worth the risk. For these kinds of problems, it’s wise to find a qualified technician who specializes in motorized awning systems.
Structural Modifications and Load Assessments
Any repair that involves changing how the awning attaches to your house, or if you suspect the frame itself is compromised beyond a simple bend, needs a professional eye. This includes things like reinforcing the mounting brackets or if you’re thinking about adding extra weight or features to the awning structure. These guys can figure out if your house can handle it and make sure it’s all up to code. They can assess if your awning has been subjected to forces beyond its limits, which might mean it needs different installation modifications.
Repairs Requiring Specialized Tools or Parts
Sometimes, a repair just needs a tool you don’t have and probably won’t ever need again. Or maybe it requires a specific part that’s hard to find. In these situations, paying a professional often makes more sense. They have access to the right equipment and can source the correct parts, saving you the headache and potential frustration of trying to DIY it with the wrong stuff. It’s about getting the job done right the first time.
It’s important to remember that your awning is an investment. While DIY repairs can save money, sometimes the cost of a mistake – whether it’s further damage, injury, or voiding a warranty – outweighs the initial savings. Knowing your limits and when to call for help is part of good maintenance.
Preventing Future Awning Damage
Nobody wants to deal with awning repairs, right? The best way to avoid them is to be proactive. Think of it like taking care of your car – regular check-ups and a little TLC go a long way.
Implementing a Regular Maintenance Schedule
Making maintenance a habit is key. It doesn’t have to be a huge chore. Just a few minutes each month can save you a lot of headaches later on. What should you be looking for? Well, start with a good visual check. Look for any loose bits of debris that might have settled on the fabric or in the tracks. Also, give the seams and any points where the fabric is under stress a good once-over. Early signs of wear, like small frays or fading, are much easier to fix than big problems.
- Monthly Inspections: Check for debris, loose threads, and early wear signs.
- Seasonal Deep Cleaning: Tackle tougher stains and prevent mildew buildup.
- Hardware Check: Tighten any loose screws or bolts on the frame and mounting brackets.
Keeping your awning clean is also a big part of prevention. Bird droppings, tree sap, or even just dirt can break down the fabric over time if left unchecked. A simple rinse with water can do wonders, but for tougher spots, a mild soap solution usually does the trick. Just make sure the fabric is completely dry before you roll it back up, especially if you’re storing it for the season. Leaving damp fabric rolled up is a fast track to mold and mildew, and nobody wants that.
A little bit of attention now can mean the difference between a quick fix and a costly replacement down the road. Don’t wait for a problem to appear; make prevention your first line of defense.
Proper Awning Operation Techniques
How you use your awning matters too. Always operate your awning smoothly and avoid forcing it. If it feels stuck, don’t just yank on it. That’s a surefire way to rip the fabric or damage the mechanism. Instead, stop and figure out what’s causing the resistance. It could be a bent arm, a sticky roller, or something else that needs a closer look. Understanding how your specific awning works, maybe by checking out the owner’s manual, can help you operate it correctly.
Prompt Cleaning of Debris and Stains
Don’t let little messes turn into big issues. Things like leaves, twigs, or even pollen can accumulate. If left to sit, especially when wet, they can start to break down the fabric or cause discoloration. A quick sweep or hose-down after a windy day or a heavy pollen season can make a huge difference. For stains, address them as soon as you notice them. The longer a stain sits, the harder it is to remove. For stubborn spots, a gentle cleaning solution is usually effective. If you’re storing your awning for the winter, make sure it’s clean and dry before you retract it completely. This is a good time to consider protecting the fabric from sun damage if it’s going to be exposed while retracted. And if you live in an area with harsh winters, taking the awning down and storing it indoors can really help prevent mold and mildew during the off-season.
Conclusion
Your awning is a great addition to your home, offering shade and comfort. While small fixes like tears can often be handled with DIY kits, bigger problems with the frame or mechanics might need a pro. Taking care of your awning with regular checks and cleaning can save you a lot of trouble and money down the road. Don’t let little issues turn into big ones – a little attention keeps your awning working well for years.
Frequently Asked Questions
Can I use regular thread to sew up a tear in my awning fabric?
Probably not. Regular thread might not be strong enough for outdoor fabrics, and it can break down in the sun. It’s best to use a heavy-duty thread made for outdoor use, often called PTFE or UV-resistant thread. Your home sewing machine might also struggle with the thick material.
My motorized awning won’t move. What should I check first?
First, check if the power is on. Look at your home’s circuit breaker or the GFCI outlet the awning is plugged into. If it has power, listen for a humming noise when you try to use the remote. Sometimes, the fabric might be bunched up, or the limit settings just need to be reset.
How do I fix a small hole or tear in the awning fabric?
For small holes or tears, you can often use a special awning repair tape or a fabric patch. Clean the area well, cut a patch a bit bigger than the hole, and stick it on, making sure to smooth out any air bubbles. For slightly larger tears, you might need to glue a patch on and then stitch around the edges for extra strength.
What causes my awning to make squeaking or grinding noises?
Those noises usually mean something needs a little lubrication. Grit and dust can get into the moving parts, like pivot points. Try using a dry silicone spray to clean and lubricate them. Avoid oily sprays like WD-40, as they can attract more dust.
When should I stop trying to fix my awning myself and call a pro?
If the repair involves working with electricity on a motorized unit, or if the frame is bent or looks unstable, it’s time to call a professional. Also, if the repair requires special tools you don’t have, or if you’re just not comfortable working high up, it’s safer to get expert help.
How often should I clean my canvas awning?
It’s a good idea to give your awning a quick look-over about once a month. Brush off any loose leaves or dirt. A good cleaning a couple of times a year, or whenever it looks dirty or has stains, will help keep the fabric in good shape and prevent mildew.