
Here are the main points to remember when you decide to replace the webbing on your patio chairs. Keep these in mind to make the process smoother and get the best results for your outdoor furniture.
Key Takeaways
- Always check the condition of your existing webbing and frame before starting.
- Measure your old webbing carefully or use the chair itself as a guide for new measurements.
- Gather all necessary tools and new webbing before you begin the actual replacement.
- When installing, ensure the new webbing is taut but doesn’t warp the chair frame.
- Test the new webbing for security before fully relaxing on your refreshed chairs.
Assessing Your Patio Chairs For Webbing Replacement
Before you even think about buying new webbing or grabbing your tools, it’s a good idea to take a close look at your patio chairs. Not all chairs are created equal, and some might be beyond a simple webbing swap. Plus, understanding what you’re dealing with now will make the whole replacement process smoother.
Identifying Worn Out Patio Furniture Webbing
So, how do you know if your chairs actually need new webbing? It’s usually pretty obvious. The most common sign is sagging or stretched-out straps. If you sit down and feel like you’re sinking way too low, or the webbing looks loose and baggy, it’s definitely time for a change. You might also notice:
- Fading or Discoloration: Sun exposure can really do a number on webbing, making it look dull or patchy.
- Cracking or Fraying: Over time, the material can become brittle and start to crack or unravel, especially at the edges.
- Loss of Support: Even if they don’t look totally ruined, if the chairs just don’t feel as supportive as they used to, the webbing has likely lost its elasticity.
It’s also worth checking the chair frames themselves. Are they sturdy? Any rust or damage? While this guide focuses on the webbing, you don’t want to put all new straps on a wobbly or broken frame. If the frames are in good shape, though, replacing the webbing is a fantastic way to give your furniture a whole new life. You can even pick out new colors for your patio furniture to really update the look.
Understanding Different Webbing Types and Sizes
Patio furniture isn’t one-size-fits-all, and neither is its webbing. Different manufacturers use different materials and dimensions. You’ll typically find:
- Vinyl Straps: These are common and come in various widths, usually around 1.5 inches or 2 inches. Some chairs use individual straps, while others have a continuous weave.
- Woven Webbing: This is often a fabric material, sometimes with a bit of stretch, used in a continuous loop or pattern.
Knowing the type and width is super important for buying the right replacement material. You can usually figure this out by:
- Measuring: Get a tape measure and see how wide the existing straps are. Measure the length too, but we’ll get to that in more detail later.
- Checking Manufacturer Info: If you know the brand of your chairs, you might be able to find specs online. Some brands, like Brown Jordan, are known for using specific widths.
Don’t just guess the size. Getting the measurements wrong means the new webbing won’t fit right, and you’ll have to start all over again. It’s better to measure twice and cut once, as they say.
If you’re dealing with a more complex weave pattern, like a basket weave, it might be a bit trickier. For those, you might want to check out resources on how to install vinyl straps to get a better idea of the techniques involved.
Preparing For Patio Chair Webbing Replacement
Before you start ripping out that old, saggy webbing, let’s get you prepped. This isn’t a job you can just wing; a little planning goes a long way. Having the right tools and materials ready will make the whole process smoother and prevent those frustrating mid-job trips to the hardware store. Think of it like packing for a camping trip – you wouldn’t want to forget your tent poles, right?
Gathering Necessary Tools and Materials
To get this webbing replacement done right, you’ll need a few things. Don’t worry, most of these are pretty standard household items or easily found at your local hardware shop.
- New Webbing: This is the star of the show. Make sure you get the right type and width. Some chairs use a continuous weave, while others use individual straps. You can often find durable options made from materials like PVC-coated polyester mesh, which holds up well outdoors [3b5a].
- Measuring Tape: For getting those lengths just right.
- Utility Knife or Heavy-Duty Scissors: To cut the webbing cleanly.
- Screwdriver Set or Drill with Bits: Depending on how your old webbing is attached (screws or rivets).
- Pliers: Useful for pulling out old fasteners or holding things in place.
- Work Gloves: To protect your hands.
- Safety Glasses: Always a good idea when working with tools.
- Replacement Fasteners: If your old screws or rivets are beyond saving, you’ll need new ones. Often, screws are used in place of pop rivets for new webbing.
Measuring Existing Webbing Accurately
This is where precision really matters. If you cut your new webbing too short, you’ll be back to square one. Too long, and it might not tension properly.
- Use Old Webbing as a Template: The easiest way is to carefully remove an old piece of webbing and use it to measure your new material. Lay it flat and see how long it is. If the old webbing is too stretched out or damaged to get a good measurement, don’t fret.
- Measure In Place: For a more accurate measurement on intact webbing, you can sometimes measure directly on the chair frame. Lay the new webbing across the frame where the old one was, letting it hang over each side by about two inches. This extra bit will be used for attachment.
- Account for Overlap: Remember that you’ll need a couple of inches of overlap on each end of the webbing to secure it to the frame. This is why letting it hang over by two inches is a good rule of thumb.
Getting these measurements right is key. It’s not just about the length, but also about the width. Make sure your new webbing matches the old in width, or it won’t fit correctly into any channels or attachment points on the chair frame. Double-checking your measurements before you cut anything is always a smart move.
If you’re replacing multiple pieces, it’s a good idea to keep track of which measurement goes with which part of the chair (seat vs. back, horizontal vs. vertical). Some companies might even have specific measurements for their furniture lines, so if you know the brand, a quick search might help. Most replacement parts, like webbing and fasteners, usually ship within a few business days [e172].
Removing Old Webbing From Patio Chairs
Alright, let’s get down to business with taking off that old, tired webbing. This is where things start to look like a real project, and honestly, it can be a bit satisfying to peel away the worn-out stuff. The goal here is to get the frame completely clear and ready for its fresh new look.
Detaching Webbing Secured by Screws
Many chairs use screws to hold the webbing in place. You’ll usually find these along the edges where the webbing meets the chair frame. Grab your screwdriver – a Phillips head is common, but check yours – and start unscrewing. Keep a small container handy for all those screws; you won’t need them again, but it’s good to keep your workspace tidy. Sometimes, the screws can be a bit stubborn, especially if they’ve been out in the elements for a while. A little penetrating oil might help if they’re really stuck, but usually, a firm grip and steady pressure do the trick. Once all the screws are out, you should be able to carefully pull the old webbing away from the frame. If you’re replacing fabric on lounge chairs, this step is similar to unscrewing and removing stretcher bars.
Drilling Out Pop Rivets
Some chairs, especially older or lighter-weight models, might use pop rivets instead of screws. These look like small metal pins. If you see these, you’ll need a drill. The trick is to use a drill bit that’s just slightly larger than the center pin of the rivet. You want to drill into the head of the rivet, essentially breaking it apart. Go slow and steady. Once the head is gone, you can usually push the rest of the rivet through the frame with a punch or even the tip of your drill bit. Be careful not to enlarge the hole in the frame itself, as you’ll need a solid spot to attach the new webbing later. This method is common when you’re dealing with sling chair fabric removal.
It’s important to be methodical when removing the old webbing. Rushing this step can lead to damaging the chair frame, which would be a much bigger problem to fix than just replacing the webbing. Take your time and work carefully around each attachment point.
Here’s a quick rundown of what to expect:
- Screws: Usually found on more robust chairs. Easy to remove with a screwdriver.
- Pop Rivets: Common on lighter frames. Requires drilling to remove.
- Adhesive: Less common, but some webbing might be glued. You might need a putty knife or gentle prying to loosen it.
Once all the old webbing is off, take a moment to wipe down the frame. Get rid of any dust, dirt, or old adhesive residue. This makes the next steps much smoother and ensures a clean finish for your newly webbed chair.
Cutting And Preparing New Webbing
Alright, so you’ve got your old webbing off and you’re ready to get those new straps cut. This is where things start to look like actual progress! Using the old webbing as a guide is usually the easiest way to go. It gives you a pretty good idea of the length you’ll need.
Using Old Webbing as a Template
Lay your old webbing out flat. Try to get it as straight as possible, even if it’s stretched out. You can use it to measure your new webbing. Just lay the new strap next to it and mark where you need to cut. If the old webbing is super frayed or looks like it’s lost all its shape, it might not be the best template. In that case, you can loosely weave a new piece onto the chair frame, let it hang over each side by about two inches, and then cut it. This gives you a little extra to work with when you attach it.
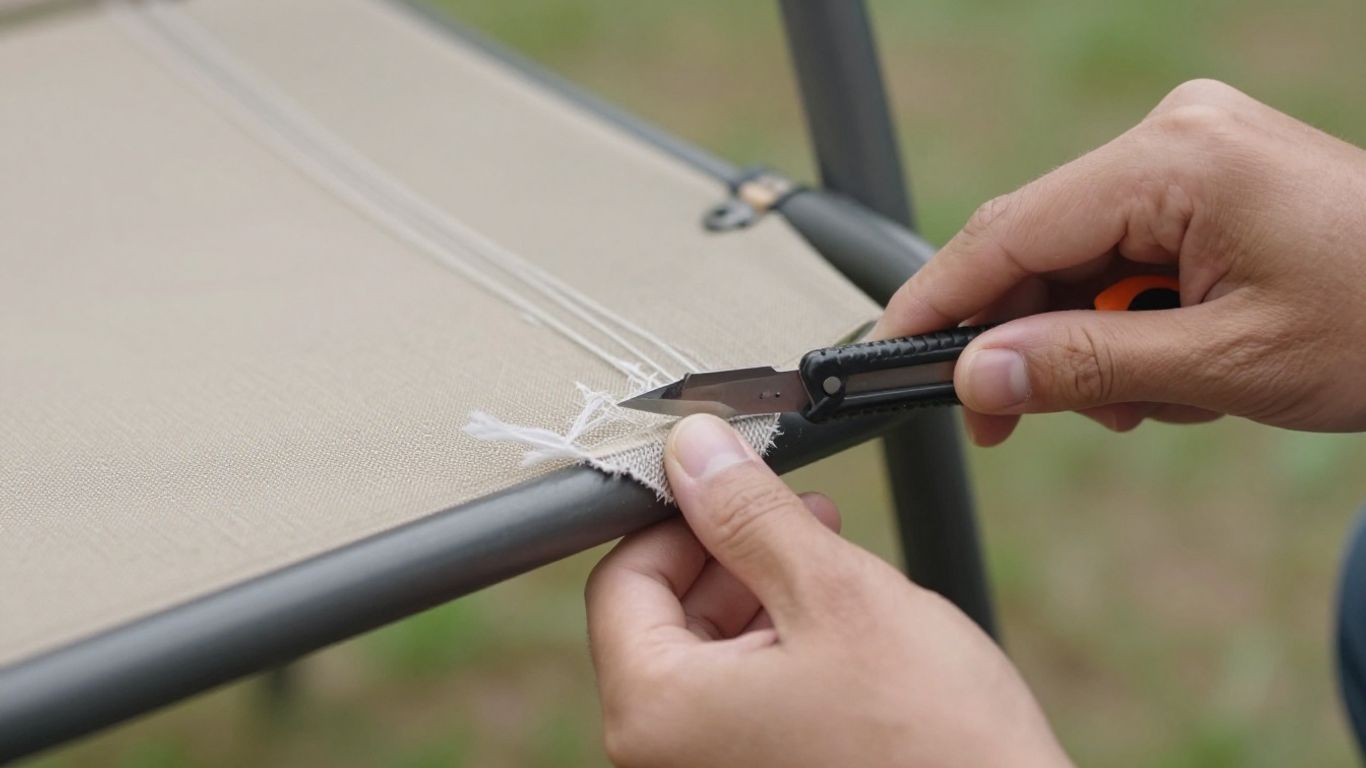
Cutting New Webbing to Size
Once you’ve got your measurements, it’s time to cut. A good pair of sharp scissors or a utility knife works well. Make sure you cut straight lines. You don’t want any jagged edges that could fray later on. Remember, it’s better to cut a little long than too short. You can always trim excess, but you can’t add more webbing if you mess up the length.
Drilling Holes for Attachment
Now, for the attachment points. You’ll need to drill holes in the ends of your new webbing. The size of the hole depends on the screws or rivets you’ll be using. Usually, a drill bit that’s just slightly larger than your fastener is perfect. Make sure the holes are spaced correctly so they line up with the holes in your chair frame. If you’re using screws, you’ll want to put a washer on each one when you attach the webbing later. This helps spread the pressure and prevents the screw head from tearing through the strap. This 25mm beige C36 webbing is pretty forgiving and easy to work with for drilling.
Be precise when drilling your holes. Misaligned holes can make attaching the webbing much harder and might even weaken the strap over time. Measure twice, drill once, as they say.
Here’s a quick rundown of what you’ll need for this part:
- Sharp scissors or utility knife
- Measuring tape
- Drill with appropriate drill bits
- Screws and washers (if applicable)
- A flat, stable surface for cutting
Installing New Webbing On Patio Chairs
Attaching Webbing to the Frame
Alright, so you’ve got your new webbing cut and ready to go. This is where things start to look like actual patio chairs again. You’ll want to start at one end of the frame, usually the back of the seat or the bottom of the backrest. Lay the webbing across the frame, making sure it’s centered. Fold about an inch of the end under itself – this gives you a cleaner edge and a stronger attachment point. Then, use screws and washers to secure it to the frame. Don’t just wing it with the screws; make sure they’re the right size and type for your chair’s frame. If you’re unsure about the best fasteners, checking out polypropylene webbing might give you some ideas about what works well with outdoor materials.
Achieving Proper Webbing Tension
This is probably the trickiest part. You want the webbing to be snug, but not so tight that it warps the frame or makes the webbing itself look strained. Think of it like tuning a guitar – you want it taut, but with a little give. As you attach the webbing, pull it firmly across the frame to the other side. Again, fold the end under, and secure it with screws and washers. The goal is a firm, even tension across the entire seat or back. If you’re replacing slings, this process is quite similar, and there are guides that can help you get the tension just right for those too.
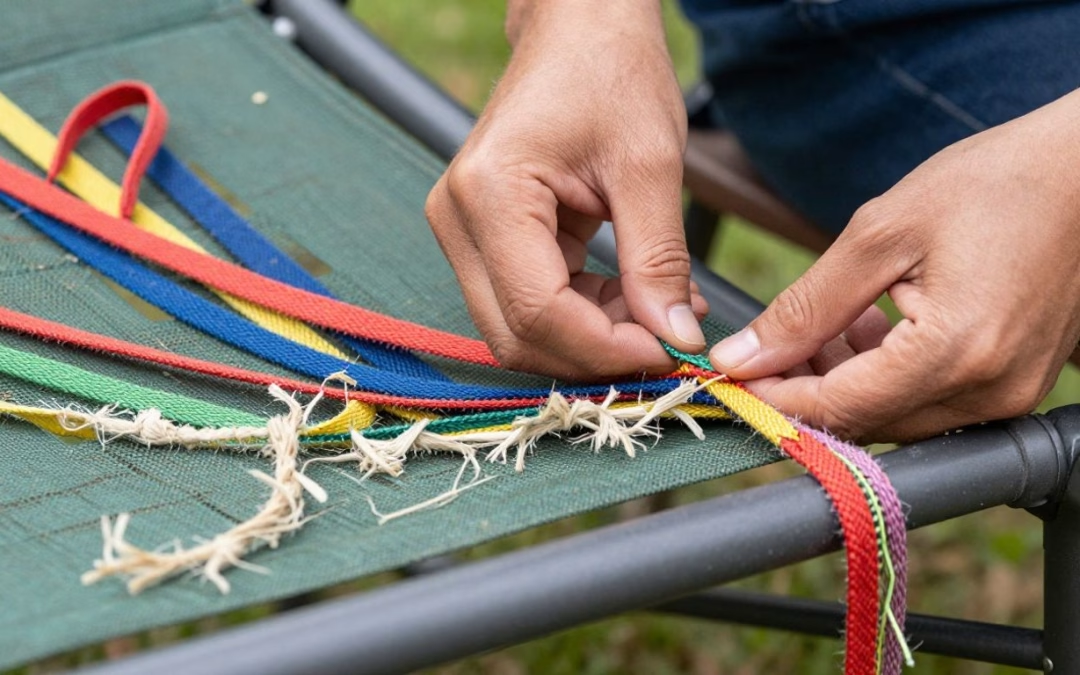
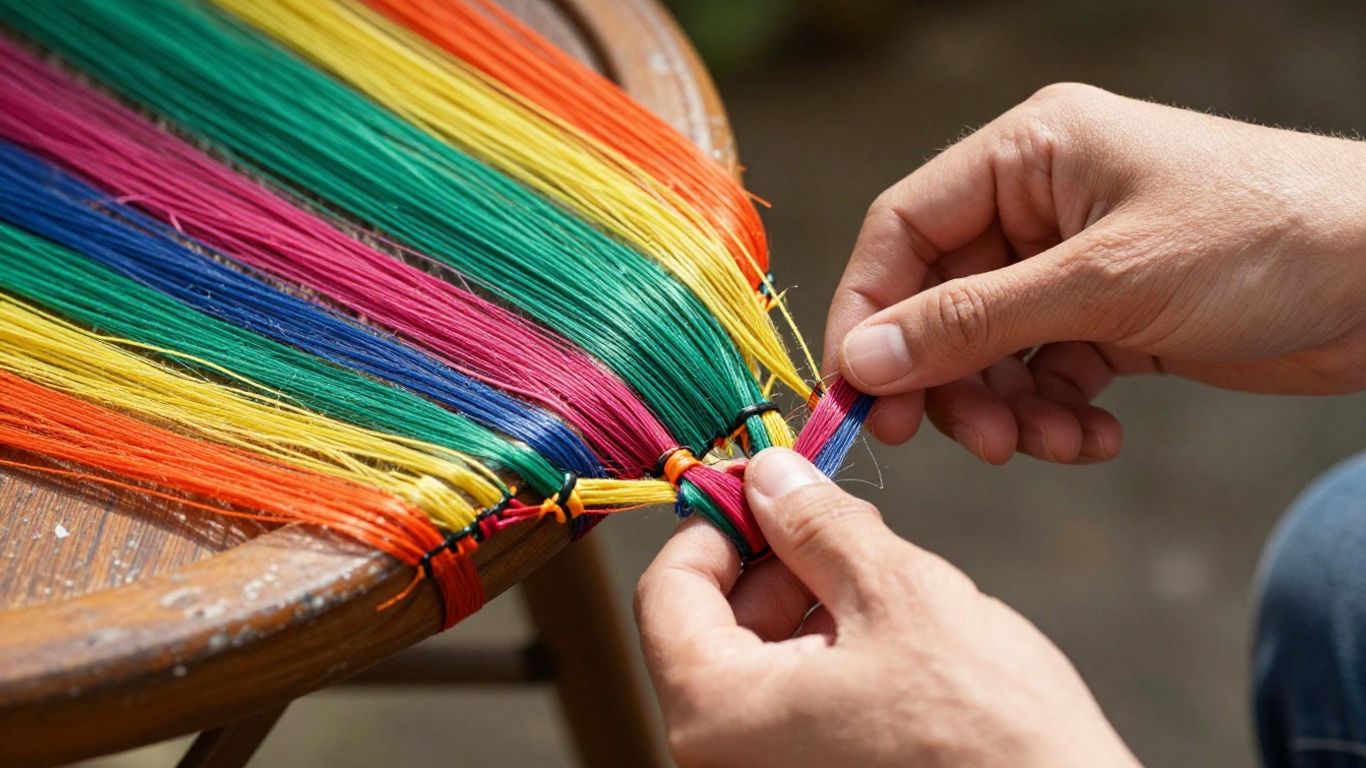
Weaving Patterns for Seat and Back
Now, for the weaving. If your chairs have a simple, single-strap design, you’ll just repeat the attachment process, working your way across the seat or back. For more complex patterns, like a basket weave, you’ll need to pay close attention to how the straps interlace. Start by attaching one set of straps running in one direction (say, side-to-side). Then, weave the other set of straps (front-to-back) over and under the first set. It’s like a little textile puzzle. Make sure each strap is laid neatly next to the previous one, maintaining that consistent tension we talked about. It might take a bit of fiddling to get the pattern looking just right, but the result is worth it.
Remember that outdoor furniture is exposed to a lot of weather. The materials you choose and how you attach them need to withstand sun, rain, and temperature changes. Taking your time here will pay off in the long run, preventing sagging or premature wear.
Here’s a quick rundown of the weaving process for a basic pattern:
- Start with the first strap, attaching it securely at one end.
- Pull it taut across the frame and attach it at the other end.
- For the next strap, lay it right beside the first one, maintaining even tension.
- Continue this process until the entire surface is covered.
- If doing a basket weave, alternate going over and under for subsequent straps.
Final Steps For Your Refurbished Patio Chairs
Alright, you’ve put in the work, and your patio chairs are looking spiffy again. Before you kick back and relax, there are just a couple of things to check to make sure everything is solid.
Testing The New Webbing For Security
First things first, give the new webbing a good tug. You want to make sure it feels secure and doesn’t wiggle around. Gently press down on the webbing in different spots. It should feel firm and supportive, not loose or saggy. If anything feels off, now’s the time to tighten or re-secure it. A quick wiggle test can save you a lot of trouble later on. It’s also a good idea to check all the attachment points – screws or rivets – to ensure they’re snug. You don’t want anything coming undone when you least expect it.
Enjoying Your Renewed Patio Furniture
Now for the best part! Take a seat and really feel the difference. Your chairs should be comfortable and sturdy, ready for many more seasons of use. Think about how much you’ve saved by refurbishing instead of buying new. It’s a great feeling to bring old furniture back to life, and it’s better for the planet too. If you’re thinking about other pieces that might need a refresh, consider that couch upholstery can also be a smart alternative to replacement. Remember to care for your furniture properly to make it last; allow it to air dry and avoid harsh cleaners that could scratch the finish.
Taking the time to properly install and test your new webbing means your chairs will be comfortable and safe for years to come. It’s a satisfying project that adds value and extends the life of your outdoor living space.
Conclusion
Replacing the webbing on your patio chairs can seem like a big job, but by following these steps, you can bring your favorite outdoor furniture back to life. It’s a rewarding project that saves you money and lets you enjoy your patio in style. So grab your tools and get ready to give your chairs a fresh new look!
Frequently Asked Questions
How do I know if my patio chair webbing needs replacing?
You’ll know it’s time to replace the webbing if it looks worn out, faded, or feels loose. If the chair doesn’t feel as supportive as it used to, that’s another big sign that the webbing has seen better days.
What kind of webbing should I buy?
There are different types and sizes of webbing. It’s best to check what your specific chair uses. Some chairs use a continuous weave, while others use individual straps. Measuring what you have or looking up your chair’s brand can help you find the right fit.
What tools do I need to replace the webbing?
You’ll likely need a few basic tools. Think about a measuring tape, scissors or a utility knife for cutting, a drill with bits for making holes, and screws or pop rivets for attaching the new webbing. Washers are also a good idea to use with screws.
How tight should the new webbing be?
The webbing needs to be pulled tight enough to be supportive, but not so tight that it bends or damages the chair’s frame. It should feel firm and secure. Getting the tension just right is important for comfort and durability.
Can I replace webbing on any patio chair?
Generally, yes, most webbed patio chairs can be re-webbed. However, some chairs have more complex patterns, like a basket weave, which can be trickier to get right. Simple strap designs are usually easier for DIY projects.
How long will new webbing last?
With good quality webbing and proper installation, your new webbing should last for several years. Protecting the chairs from harsh weather when possible can help extend their life even further. Regular checks can catch issues early.