
If you’re just starting out with canvas, here are a few things to remember before you get sewing.
Key Takeaways
- Use a strong needle and heavy-duty thread to avoid breakage.
- Prewash and press cotton canvas to prevent shrinking later.
- Test your machine settings on scrap canvas before starting your project.
- Clips or fabric tape work better than pins for holding layers together.
- Go slow and reinforce seams for strong, long-lasting results.
Essential Tools For Sewing Canvas Fabric
If you’re brand new to sewing canvas, grabbing the right gear right from the start can really save you headaches. Canvas is a heavy, tough material, so ordinary tools often just don’t cut it. Here’s how to set yourself up for less frustration and better results.
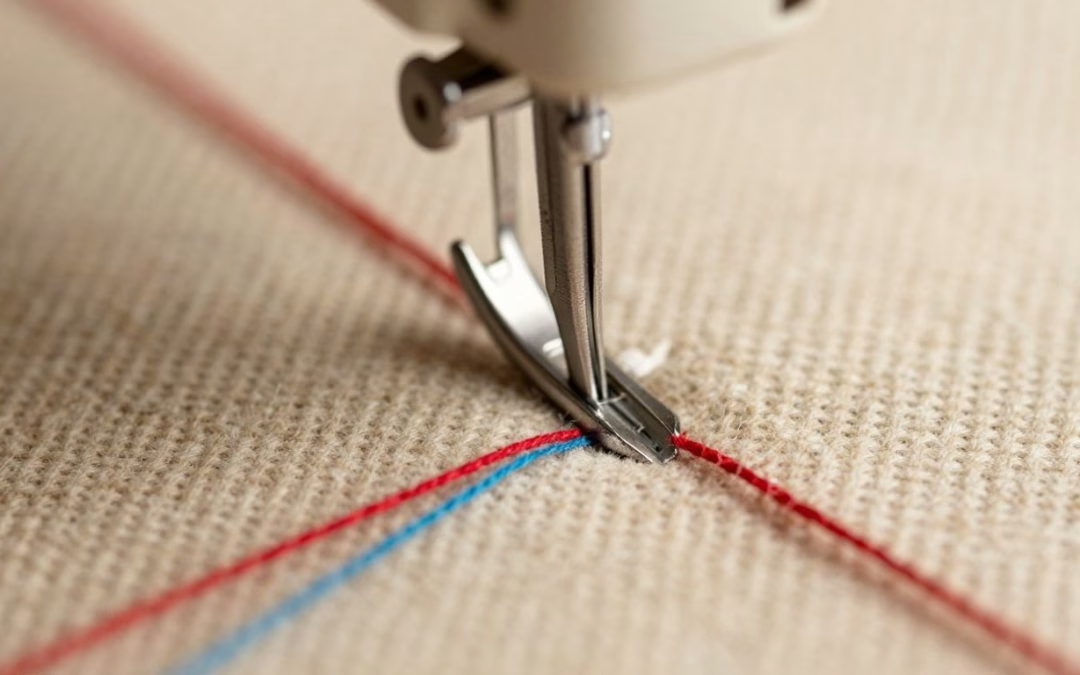
Choosing the Right Needle and Thread
The needle and thread you use make all the difference when working with canvas. Ordinary needles will bend or break. What you want is:
- A heavy-duty needle, like a denim/jeans needle, usually size 90/14 to 100/16.
- Strong polyester or upholstery thread—skip the delicate, thin stuff.
- For outdoor projects, UV-resistant polyester thread holds up much better than cotton.
| Needle Type | Typical Size | Best For |
|---|---|---|
| Denim/Jeans | 90/14, 100/16 | Basic cotton canvas |
| Leather | 90/14+ | Extra thick canvas |
| Universal | 100/16 | Medium canvas |
If you ever feel confused about types, just remember: the thicker the fabric, the thicker the needle and thread should be.
Selecting the Appropriate Sewing Machine Foot
Canvas loves to slide around or get stuck under the regular presser foot. Try these instead:
- Walking foot—feeds thick fabric evenly to avoid shifting layers.
- Bulky overlock or Teflon foot—for extra grip and less drag on sticky finishes.
- Roller foot—for smoother movement over sticky or waxed canvas.
Switching your presser foot is simple, and doing so can stop canvas from stretching or bunching up. It’s a little change that makes a big impact.
Gathering Fabric Securing Tools
Holding heavy canvas in place while you sew can be surprisingly tricky. The right tools help you avoid crooked seams or accidental pokes.
- Heavy-duty fabric clips—much easier than pins through thick layers.
- Double-sided fabric tape—keeps seams steady without shifting.
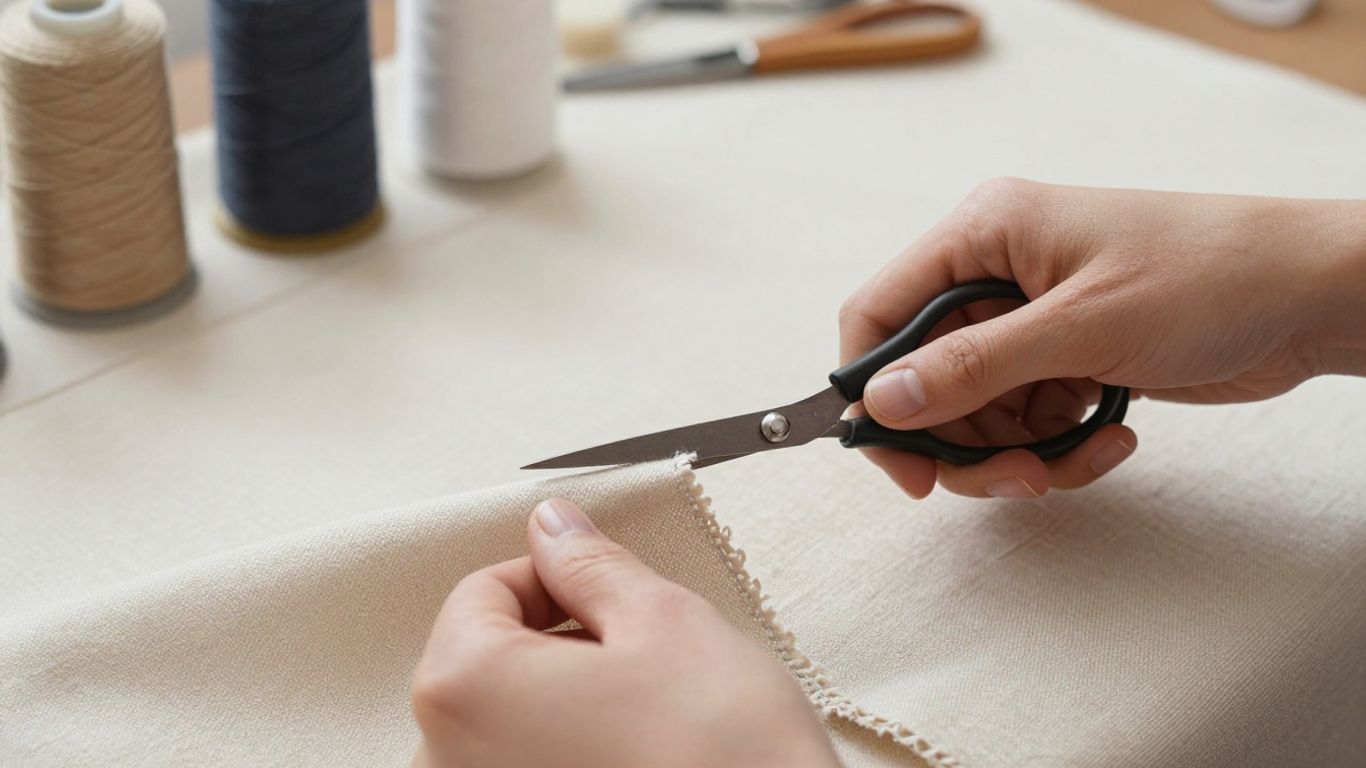
- Sharp fabric scissors or a rotary cutter—for cleaner, straighter cuts through tough and layered fabric.
- Measuring and marking tools—tailor’s chalk, washable markers, and a long ruler make marking easier.
A hotknife is also a handy tool, especially if you need to seal synthetic edges or webbing and want to avoid fraying before sewing.
When setting up your sewing area, keep all these tools handy—nothing kills momentum like having to search for scissors mid-project.
Just getting these core tools together makes canvas way less intimidating. Next up: prepping your material, so cutting and sewing are even easier.
Preparing Your Canvas Material
Before you even think about threading your sewing machine, giving your canvas fabric a little attention upfront makes a world of difference. It’s like prepping your ingredients before cooking – it just makes the whole process smoother.
Prewashing and Pressing Cotton Canvas
If you’re working with cotton canvas, it’s a really good idea to give it a wash and dry before you start cutting. Cotton canvas can shrink, and you definitely don’t want that happening after you’ve spent hours sewing your project. Washing it first means any shrinking happens now, not later when it’s too late to fix. After it’s completely dry, give it a good press with your iron. Use the hottest setting your fabric can handle, and don’t be shy with steam or a spray bottle of water. A well-pressed canvas lies flat, making it so much easier to mark and cut accurately. This step is often skipped, but it really does help.
Accurate Marking and Cutting Techniques
Once your canvas is prepped and pressed, spread it out on a large, flat surface. Now, grab your pattern pieces and a fabric marker or tailor’s chalk. Take your time when you’re marking out your pattern pieces or any seam lines. Accuracy here is key, especially with a thick fabric like canvas. A clear, precise line is your best friend for sewing straight seams later on. When it’s time to cut, reach for sharp scissors or a rotary cutter. A dull blade can snag the fibers, leading to messy, frayed edges that are a pain to deal with. Clean cuts make everything line up nicely.
Managing Fraying Edges
Canvas, especially certain types, can be a bit of a frayer. You’ll notice it right after cutting. Some fabrics are worse than others. Don’t let this get you down. You have a few options for dealing with those wiggly threads:
- Fold and Hem: The most common method is to fold the raw edge under twice and stitch it down. This creates a clean, enclosed edge.
- Serging: If you have a serger, running the edge through it will create a neat, overlocked finish that stops fraying.
- Pinked Edges: For projects where the seam allowance won’t be seen, you can use pinking shears to cut along the edge. This creates a zig-zag pattern that helps reduce fraying, though it’s not as robust as other methods.
Taking a few extra minutes to prepare your canvas properly, from prewashing and pressing to careful marking and cutting, sets you up for a much more enjoyable sewing experience. It prevents headaches down the line and results in a more professional-looking finished product. It’s worth the effort.
If you’re looking for more tips on working with this sturdy material, check out this beginner-friendly guide on sewing canvas.
Setting Up Your Sewing Machine For Canvas
Alright, so you’ve got your canvas prepped and ready to go. Now it’s time to get your sewing machine in on the action. Canvas is a tough fabric, so it needs a little extra attention from your machine to get the best results. Think of it like giving your machine a pep talk and a sturdy pair of boots before a big hike.
Selecting Heavy-Duty Needles
First things first, ditch that tiny, flimsy needle you use for delicate silks. Canvas needs something with some backbone. You’ll want to grab a needle that’s specifically designed for heavier fabrics. A universal needle in size 80/12 or 90/14 is a good starting point, but if you’re working with really thick canvas, a denim or even a leather needle is your best bet. These are built to power through dense fibers without bending or snapping. It’s like using the right tool for the job – a small change that makes a huge difference.
Choosing Strong Sewing Threads
Just like the needle, your thread needs to be up for the challenge. Forget those thin, wispy threads that look like they might snap if you sneeze. You need a strong, durable thread. Polyester thread is a solid choice because it holds up well and doesn’t stretch too much. Cotton-wrapped polyester is also great. Look for threads labeled as heavy-duty or even outdoor-grade if you want extra assurance. The goal here is to make sure your seams can handle whatever you throw at them, whether it’s a heavy tote bag or a sturdy pair of work pants. A good thread means your project will last.
Adjusting Stitch Length and Tension
Canvas doesn’t like tiny, cramped stitches. They can actually cause the fabric to bunch up and look messy. So, you’ll want to increase your stitch length. Most people find that a setting between 3.0 and 3.5 millimeters works wonders. This gives the stitches enough room to lay flat and look neat on the thicker material. You might also need to play with your machine’s tension. Sometimes, with heavier fabrics, the tension needs to be slightly loosened so the thread can move freely without pulling too tight. It’s worth doing a few test stitches on a scrap piece to get it just right before you start on your actual project. You can find some great advice on adjusting stitch length.
Utilizing a Walking Foot
If you have a walking foot for your machine, now is the time to use it. Seriously, this thing is a game-changer for thick fabrics like canvas. A walking foot has an extra set of feed dogs that move the top layer of fabric along with the bottom layer. This means your fabric feeds through the machine evenly, preventing the layers from shifting or puckering. It helps keep everything aligned and makes sewing long, straight seams so much easier. It’s like having an extra pair of hands helping to guide the fabric smoothly. If you don’t have one, they can be a worthwhile investment for anyone who plans on sewing a lot of heavy materials.
Getting your machine set up correctly is half the battle when sewing canvas. Using the right needle, strong thread, adjusting your stitch length, and considering a walking foot will save you a lot of frustration and lead to much better-looking results. Don’t skip these steps!
Remember, taking a little extra time to set up your machine properly will make the actual sewing process much smoother and the final outcome much more professional. Happy stitching!
The Sewing Process For Canvas
Alright, so you’ve got your canvas prepped, your machine is set up with that beefy needle and strong thread, and you’re ready to actually start sewing. This is where things start to look like a real project! It’s not super complicated, but taking your time makes a huge difference.
Sewing a Test Seam
Before you dive into your actual project pieces, do yourself a favor and sew a test seam. Grab a couple of scraps of your canvas, stack them up just like you would for your project, and run them through your machine. This is your chance to see how the fabric feeds, if the stitch length and tension are right, and if your needle is handling it like a champ. It’s way better to find out your thread is too weak or your needle is dull on scraps than on the piece you’ve spent ages cutting out. If it looks good, you’re golden. If not, tweak those settings until it’s perfect. You can find some great tips on hand sewing canvas if you’re going that route too.
Securing Layers Before Stitching
Canvas can be a bit slippery, especially if you’re working with multiple layers or curves. To keep everything from shifting while you sew, use clips or pins. Binder clips work surprisingly well for canvas because they have a strong grip. If you’re using pins, make sure they’re long enough to go through all the layers and place them about an inch away from the seam line. This prevents them from getting caught in the needle. For really thick canvas, sometimes just holding the layers together firmly with your hands as you start the seam is enough, but clips are generally more reliable.
Maintaining a Steady Sewing Pace
Canvas is thick, and trying to rush through it is a recipe for skipped stitches, a bent needle, or even a jammed machine. The key here is a steady, consistent pace. Let the machine do the work. Guide the fabric gently, don’t push or pull it. Think of it like a slow, deliberate walk rather than a sprint. This even pace helps the needle penetrate the fabric cleanly and allows the feed dogs to move the layers smoothly. If you’re using a walking foot, you’ll notice it helps keep everything moving together, which makes maintaining that steady pace even easier.
Reinforcing Seams and Finishing Edges
Canvas seams can take a beating, so it’s smart to reinforce them, especially in areas that will get a lot of stress, like bag handles or corners. A simple way to do this is by sewing a second line of stitching parallel to your first seam, about a quarter-inch away. This adds a lot of strength. For raw edges that might fray, you have a few options. You can fold the edge under twice to create a clean hem, or you can finish the raw edge with a zigzag stitch right along the edge. If you have a serger, that’s another great way to get a neat, non-fraying finish. A little extra effort here makes your project much more durable.
Canvas projects often see a lot of use, so thinking about seam strength and edge finishing from the start will save you from having to make repairs down the line. It’s all about building something that lasts.
Once you’re done sewing, it’s a good idea to give your seams a quick press. This makes everything look much neater and more professional. You can learn more about sewing canvas by hand if that’s your preferred method.
Finishing Your Canvas Project
So, you’ve sewn your canvas, and now it’s time to wrap things up. This is where all your hard work really starts to look like a finished piece. It’s not just about stopping the sewing machine; it’s about making sure your project looks neat and holds up over time.
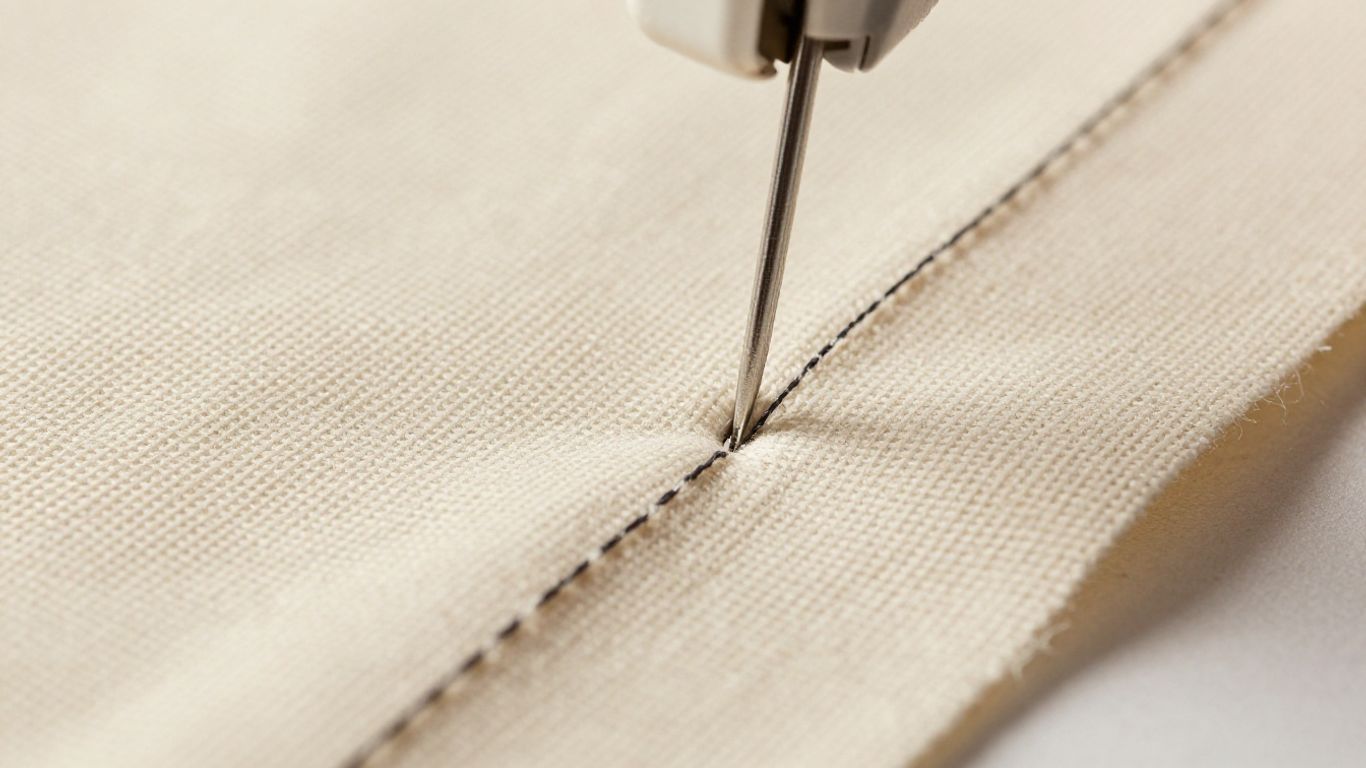
Securing the End of the Seam
When you get to the end of a seam, don’t just stop and cut. You need to lock that stitch. Flip your canvas over to the underside. Take your remaining thread and tie a good, solid knot. This little knot is what stops your seam from unraveling later, especially on something like a tote bag that gets a lot of use. After you knot it, you can weave the needle back through a few stitches on the wrong side to hide the tail. Then, trim the thread close, but not so close that the knot comes undone. It’s a small step, but it makes a big difference in how professional your project looks.
Pressing Seams for a Polished Look
Pressing is your best friend when working with canvas. Even a quick press with your iron can make a huge difference. After you’ve sewn a seam, take a moment to press it flat. This flattens out any bumps and gives your project clean lines. If you’ve sewn two pieces together, pressing the seam open or to one side will make the whole item lay flatter and look much tidier. It really does make your project look like it came from a store, not just your sewing machine.
Ensuring Durable Seam Finishes
Canvas can fray, and nobody wants a project that falls apart after a few uses. So, how do you finish those raw edges? There are a few ways to go about it. You can fold the raw edge under twice and stitch it down, creating a clean hem. Another good option is to use a zigzag stitch along the very edge of the seam allowance. This catches any stray threads and stops them from unraveling. For really heavy-duty projects, a serger is fantastic, but a simple zigzag works well for most home projects. Choosing the right seam finish means your canvas item will last much longer.
Here are some common seam finishes for canvas:
- Plain Hem: Fold the raw edge under twice and stitch.
- Zigzag Finish: Stitch a zigzag stitch along the raw edge.
- French Seam: A more advanced technique that encloses the raw edges completely within the seam.
Taking a little extra time to finish your seams properly will make your canvas projects look more professional and last a lot longer. It’s the difference between something that looks homemade and something that looks expertly crafted.
Tips for Successful Canvas Sewing
Sewing with canvas can feel like a workout for your machine and your hands, but a few smart tricks make all the difference. It’s all about understanding how this sturdy fabric behaves and giving it the right support.
Understanding Canvas Fabric Properties
Canvas isn’t just one thing; it comes in different weights and weaves. Lighter cotton canvas is more forgiving, while heavy duck canvas can be quite stiff. Knowing your canvas weight helps you pick the right tools and settings. A heavier canvas will need a stronger needle and thread, and might require a bit more effort to push through the machine. It’s also good to remember that canvas can fray quite a bit, so planning for edge finishes early on is a smart move.
Hand Sewing Canvas Techniques
If you’re not using a machine, or for smaller repairs, hand sewing canvas is totally doable. The key is to use the right gear. Think upholstery or denim needles – they’re built to handle thick fibers without bending. For thread, go for something strong like polyester or even waxed thread. A thimble or a sailmaker’s palm can save your fingers from a lot of pain when you’re pushing that needle through tough layers. It might take a bit longer, but you can get really durable stitches this way. You can find some great tips on sewing canvas by hand if you want to get into the details.
Troubleshooting Common Canvas Issues
Sometimes, things just don’t go as planned. If your machine is skipping stitches, it might be your needle. Try a fresh, heavier-duty one. If the thread is bunching up underneath, your top tension might be too loose, or your stitch length too short. Canvas likes a longer stitch, around 3 to 3.5mm, and a slightly lower presser foot pressure can help it feed smoothly. If you’re struggling to get layers to feed evenly, a walking foot is a game-changer. It helps move both layers of fabric at the same pace, preventing puckering. Don’t be afraid to sew a test seam on a scrap piece first; it’s the best way to catch any problems before they mess up your project. You can also look into different needle types to see what might work best for your specific project.
Conclusion
Sewing canvas fabric can sound tricky at first, but once you know the basics, it gets much easier. With the right needle, strong thread, and a few clever tricks, you’ll be ready to make all sorts of sturdy projects. Remember to prep your fabric, test your stitches, and take your time. Soon enough, you’ll have bags, aprons, or cushions that look great and hold up to real use. Don’t stress about making everything perfect—just keep practicing and enjoy the process!
Frequently Asked Questions
Can I sew canvas with a regular sewing machine?
Yes, most home machines can sew medium-weight canvas if you use a sturdy needle and strong thread. Just go slow and don’t force the fabric.
What needle should I use for canvas?
A denim or heavy-duty needle, usually size 90/14 or 100/16, works best for canvas. They’re strong enough to go through thick fabric.
How do I stop canvas edges from fraying?
You can fold the edges under, use a zigzag stitch, or sew a simple hem. These methods keep the edges neat and help stop fraying.
What’s the best way to mark canvas for cutting?
Tailor’s chalk or a washable fabric marker are good choices. Always test on a scrap first to make sure the marks come off easily.
Do I need a special foot for my sewing machine?
A walking foot helps feed thick canvas layers evenly, but if you don’t have one, a regular presser foot can work if you go slow.
Why does my thread keep breaking when I sew canvas?
It could be from using the wrong needle or weak thread. Try switching to a stronger needle and polyester thread, and check your tension settings.