
Here are the main points to remember when you’re ready to make your canvas waterproof at home. Keep these handy as you go through the process.
Key Takeaways
- Waxed canvas is strong, water-resistant fabric made by coating heavy canvas with wax.
- Prepare your workspace and fabric by cutting pieces first and ensuring good ventilation.
- Melt your wax mixture carefully, apply it evenly, and then use heat to melt it into the fabric fibers.
- Allow the waxed canvas to cure for at least 12-24 hours in a well-ventilated area until it’s no longer sticky.
- Clean waxed canvas by spot cleaning and reapply wax treatments every 6-12 months for ongoing protection.
Understanding Waxed Canvas Fabric
What Is Waxed Canvas Fabric?
So, what exactly is this waxed canvas stuff? Basically, it’s a heavy-duty cotton fabric, often called duck canvas, that’s been treated with a special blend of waxes. This treatment makes it pretty much waterproof. Think of it as giving your regular canvas a super-powered shield against the elements. It’s the kind of material that’s perfect for making things that need to hold up, like sturdy bags, outdoor gear, or even covers for your boat. It’s got this cool, rugged look that ages really nicely over time, almost like worn leather.
Why Choose Waxed Canvas?
There are a bunch of reasons why you might want to work with waxed canvas. For starters, it’s incredibly durable. It’s tough, resists stains, and is hard to rip or tear. Plus, when you wax it yourself, it can be a lot more budget-friendly than buying pre-made waxed fabric, which can get pretty pricey. If you’re into DIY projects and want something that lasts, making your own waxed canvas is a great way to go. It opens up a lot of possibilities for creating custom gear that’s built to last. You can even find waxed canvas fabric by the yard if you decide you prefer to start with it already treated.
Benefits of Waterproofing Canvas
Waterproofing your canvas fabric at home offers a lot of advantages. The most obvious one is, well, waterproofing! It keeps your stuff dry, which is a big deal if you’re making bags for hiking or covers for outdoor equipment. Beyond just repelling water, the wax treatment also adds a layer of toughness. It makes the fabric more resistant to wear and tear, meaning whatever you make will likely last a lot longer. It also gives the fabric a unique look and feel that many people really like. It’s a practical way to give your projects a professional, durable finish.
When you’re working with waxed canvas, remember that it’s a bit different from regular fabric. It’s stiffer and can be a little trickier to handle, especially when you’re first starting out. But with a little practice, you’ll get the hang of it. The key is patience and understanding how the wax behaves.
Here are some key benefits:
- Water Resistance: Keeps contents dry in wet conditions.
- Durability: Increases resistance to rips, tears, and general wear.
- Stain Resistance: Makes it easier to clean off dirt and grime.
- Aesthetic Appeal: Develops a unique, aged look over time.
- Cost-Effectiveness: DIY waxing can be cheaper than buying pre-treated fabric.
Preparing Your Canvas For Waterproofing
Before you even think about slathering on wax, there are a few things you need to sort out. Getting this part right makes the whole waterproofing process smoother and, honestly, a lot less messy. It’s like prepping your ingredients before you start cooking – you wouldn’t just throw everything into a pot, right?
Gathering Essential Supplies
Alright, let’s talk about what you’ll need. You can’t just grab any old wax. For canvas, a good blend is key. Think beeswax mixed with something like paraffin or even a bit of linseed oil. This combination gives you that nice, flexible barrier. You’ll also need a heat source to melt it – a double boiler setup works great, or you can use a crockpot on a low setting. Don’t forget a sturdy brush for application, some old rags or towels you don’t care about (seriously, they’ll get waxy), and of course, your canvas fabric. If you’re going for a spray-on treatment, make sure you have a quality product like Dry Guy that’s specifically made for fabrics.
Preparing Your Workspace
This is where things can get a little sticky if you’re not careful. Find a spot that’s well-ventilated – maybe your garage with the door open, or even outside if the weather’s nice and you have some cover. You don’t want to be breathing in wax fumes, and you definitely don’t want wax dripping all over your nice floors. Lay down some old newspapers, a tarp, or some cardboard to protect the surface. Wear old clothes and maybe even an apron; wax has a way of finding its way onto everything.
Pre-Waxing Fabric Considerations
So, you’ve got your canvas. Is it clean? If not, give it a good brush to get rid of any loose dirt or debris. You don’t want to trap that stuff in the wax. Also, think about your project. It’s usually best to cut out your pieces before you start waxing. Waxing a whole yard and then cutting might seem efficient, but it can be harder to work with, and you might end up using more wax than you need. If you’re using a natural wax mixture, you can learn more about creating your own waterproofing wax to get the right consistency for your project.
Here are a few things to keep in mind:
- Fabric Condition: Make sure your canvas is completely dry. Any dampness will affect how the wax adheres and cures.
- Cutting First: Cut your fabric pieces to size before waxing. This saves wax and makes handling easier.
- Ventilation: Always work in a well-ventilated area to avoid inhaling fumes.
- Protection: Cover your workspace and wear old clothing to prevent wax stains.
Working with canvas can be a bit of a learning curve, and sometimes things don’t go exactly as planned. Don’t get discouraged if your first attempt isn’t perfect. The goal is to create a functional, water-resistant fabric, and that often involves a bit of trial and error.
The Waxing Process: How To Waterproof Canvas Fabric
Alright, so you’ve got your canvas prepped and your workspace ready. Now comes the fun part: actually getting that wax onto the fabric. It might seem a little messy at first, but trust me, it’s totally doable. Just take your time and follow these steps.
Melting Your Wax Mixture
First things first, you need to get that wax mixture nice and melty. A double boiler or a slow cooker works best for this. If you’re using a slow cooker, you can put your wax mixture directly into the pot. Some folks like to speed things up by melting the wax in a microwave-safe ceramic pot first, then popping that into the slow cooker. Just be super careful when you take it out – that pot will be hot!
- Safety first: Never leave melting wax unattended. It can get really hot, and you don’t want any accidents.
- Ventilation is key: Make sure you’re in a well-ventilated area, maybe with a fan going. That wax smell can be pretty strong, and you might get some smoke when you start ironing later.
- Don’t overheat: Try not to let the wax get so hot that it starts popping or smoking excessively. You can cover it loosely with foil or a lid if needed.
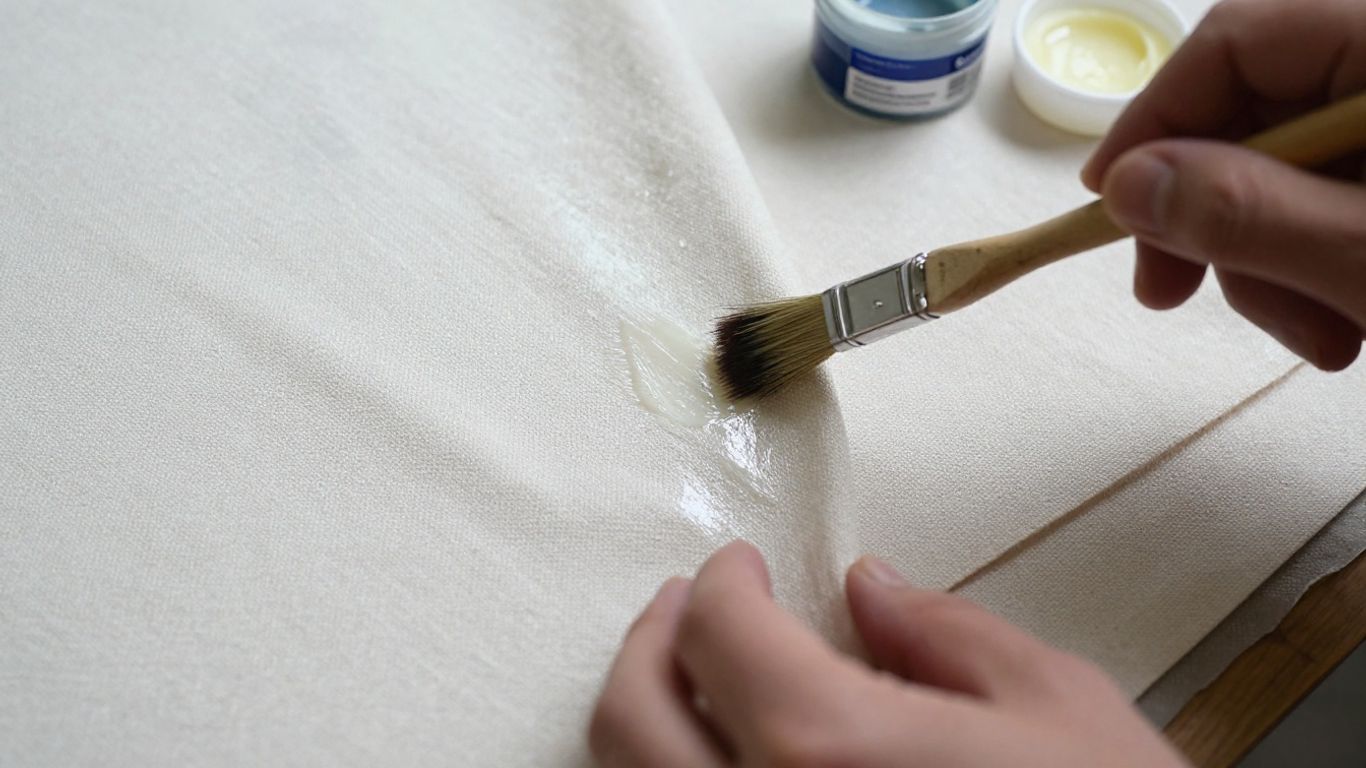
Applying Wax To The Canvas
Once your wax is liquid and ready to go, it’s time to apply it. You’ll want to work in sections. Grab a brush (an old paintbrush works great) and dip it into the melted wax. Then, start painting it onto your canvas. A good size to aim for is about a 12-inch by 12-inch area at a time. Don’t worry if the wax looks a bit streaky or turns white when it hits the cooler fabric – that’s normal. You’ll fix that in the next step.
It’s often easier to fold your canvas in half before waxing, especially for larger pieces. This way, you wax both sides at once, saving time and wax. Any wax that soaks through the top layer will help coat the bottom layer too.
Melting The Wax Into The Fabric
This is where the magic happens and you get that smooth, waterproof finish. Get your iron ready – make sure it’s on a high heat setting, and absolutely NO steam. Now, take your iron and gently go over the section you just waxed. The heat will melt the wax, making it spread evenly through the fabric fibers and get rid of those white streaks. Keep working in sections, applying wax and then ironing, until your entire piece of canvas is covered. You might need to lift the fabric a few times as you go to make sure it doesn’t stick to your work surface. If it does get a little stuck, a quick blast of heat from the iron should free it right up. You can even iron your canvas before waxing to help the wax absorb faster, though it’s not strictly necessary since you’ll be ironing it again anyway.
Here’s a quick rundown of the process:
- Melt the wax: Get your wax mixture to a liquid state safely.
- Apply the wax: Brush the melted wax onto your canvas in small sections.
- Iron it in: Use a hot, dry iron to melt and spread the wax evenly.
- Repeat: Continue this process until the entire fabric is coated.
After you’ve finished ironing, the fabric might feel a little tacky. That’s perfectly fine and means you’re ready for the next stage: curing. You can find some great DIY waterproofing wax recipes online if you want to experiment with different blends.
Curing And Finishing Your Waterproofed Canvas
Alright, so you’ve just finished slathering that wax all over your canvas. It probably looks a bit shiny and maybe even a little sticky right now. That’s totally normal! But it’s not quite ready for action yet. We need to let it cure. Think of it like letting a good meal rest before you serve it – it makes all the difference.
Understanding the Curing Process
Curing is basically giving the wax time to really soak into the fabric’s fibers and set up properly. When you first apply the wax, it’s hot and liquid. As it cools, it hardens. Curing is the final stage where that wax fully integrates with the canvas, making it tough and waterproof. This process transforms that sticky, freshly waxed material into a durable, water-resistant fabric. It’s what makes the difference between something that’s just coated in wax and something that’s truly waterproofed.
How Long Does Canvas Need to Cure?
This is where patience comes in. Most projects will need at least 12 to 24 hours to cure properly. For really thick canvas or if you applied a heavy coat of wax, you might want to give it even longer, maybe up to 48 hours. You’ll know it’s ready when it no longer feels tacky or sticky to the touch. It should feel dry and have that slightly leathery texture when you wrinkle it.
Here’s a quick rundown:
- Minimum Cure Time: 12 hours
- Recommended Cure Time: 24 hours
- For Heavy Waxing: Up to 48 hours
During this time, it’s best to hang your canvas pieces up. A shower rod or a clothesline works great. This allows air to circulate all around the fabric, helping it cure evenly. Avoid folding it or laying it flat on a surface where it might stick.
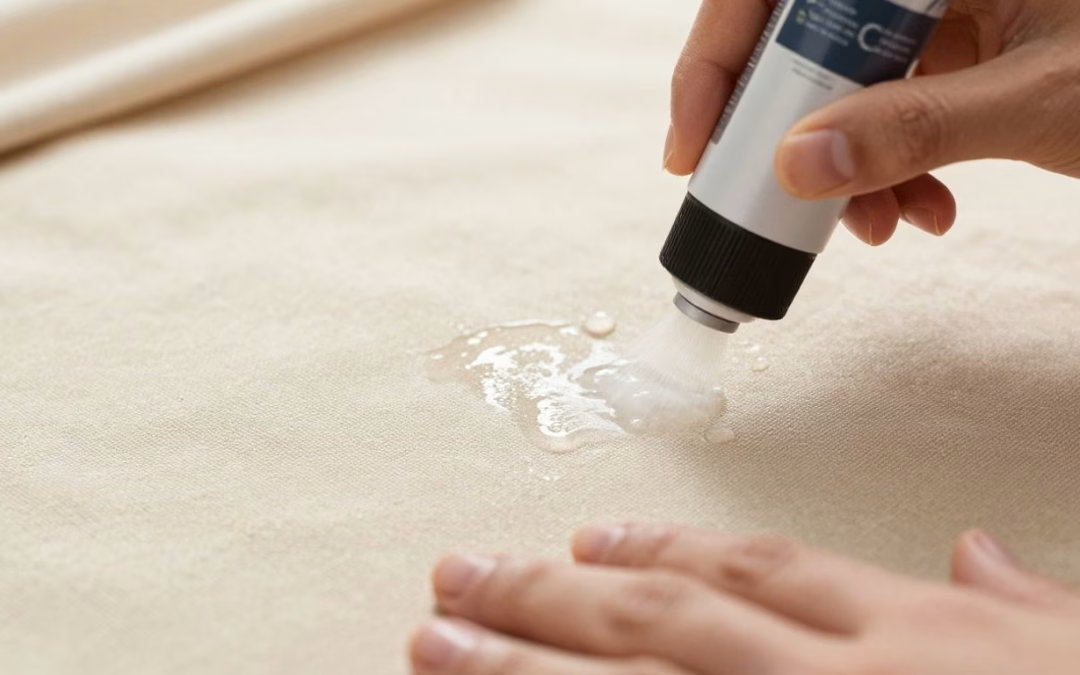
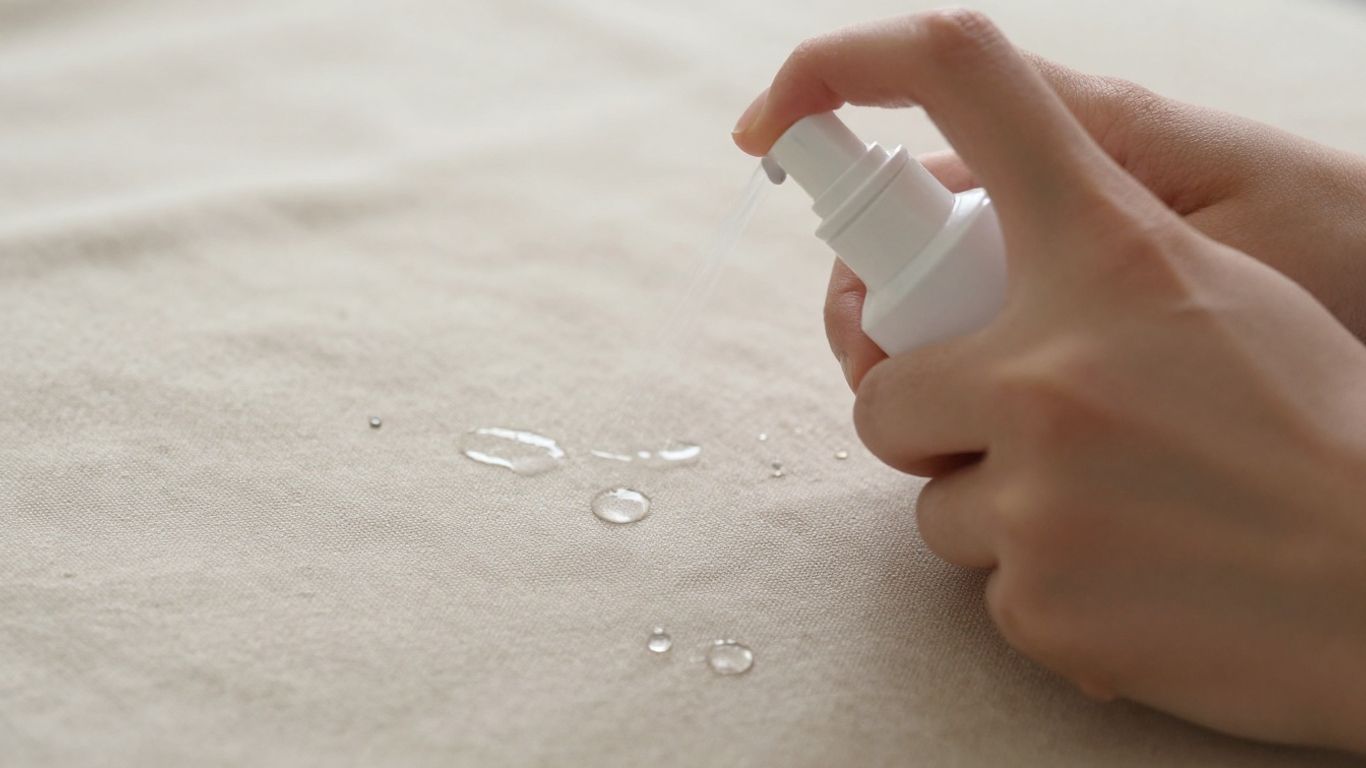
Checking for Proper Waterproofing
Once you think your canvas is cured, it’s time for a little test. Grab a small cup of water and sprinkle a bit onto the fabric. If you did it right, the water should bead up and roll right off, like it’s on a duck’s back. If you see the water soaking in, don’t worry too much. It just means you might need another light coat of wax, or perhaps a bit more curing time. You can also try a waterproofing spray as a quick touch-up if needed, though re-waxing is usually best for a full treatment.
If you notice any spots that look overly saturated with wax after it’s cured, you can gently go over them with a warm iron on a low setting. This helps to redistribute the wax evenly without melting it all away. Just be sure to do this on a protected surface, like with a pressing cloth, to avoid making a mess.
Remember, the goal is a fabric that repels water effectively. A good waxing and proper curing will get you there. If you’re looking for a quick fix for smaller items, a premium waterproofing product might be an option, but for the best results on canvas, the waxing method is hard to beat.
Maintaining Your Waterproofed Canvas
So, you’ve gone through the whole process of waxing your canvas, and it’s looking and feeling great. That’s awesome! But the job isn’t quite done yet. To make sure your hard work lasts and your canvas stays water-repellent for as long as possible, you’ve got to give it a little TLC now and then. It’s not complicated, honestly.
Cleaning Your Waxed Canvas
First off, forget about tossing your waxed canvas items in the washing machine. Seriously, don’t do it. The heat and agitation will just mess up the wax coating. Instead, think gentle. For most dirt and grime, a good old-fashioned wipe-down with a damp cloth usually does the trick. If you’ve got something a bit tougher stuck on there, you can try a soft brush. For really stubborn spots, a tiny bit of mild soap might be okay, but rinse it off really well and let it air dry completely. Never use harsh detergents or solvents.
Remember, the goal is to clean the fabric without stripping away that protective wax layer you worked so hard to apply. Think of it like caring for a good leather jacket – you want to preserve its natural qualities.
Reapplying Waterproof Treatments
Over time, especially with regular use and exposure to the elements, that waterproofing is going to wear down. It’s just a fact of life. You’ll start to notice water not beading up like it used to, and instead, it’ll soak in a bit. That’s your cue to reapply. How often you need to do this really depends on how much you use the item and what kind of weather it’s facing. For things that are out in the rain a lot, you might need to touch them up every 6 to 12 months. For less frequently used items, maybe once a year is enough. You can use the same waxing method you used initially, or if you’re just doing a light touch-up, you might be able to get away with a waterproofing spray designed for fabrics.
Proper Storage Techniques
How you store your waxed canvas items when you’re not using them makes a big difference. If you just stuff them away in a damp basement or a humid garage, you’re asking for trouble. Mold and mildew can still grow, even on waterproofed fabric, if it’s stored improperly. Always make sure the canvas is completely dry before you put it away. Then, find a cool, dry spot with decent air circulation. Don’t pack things too tightly together; give them a little breathing room. This helps prevent moisture buildup and keeps your canvas in good shape for its next adventure.
Conclusion
So there you have it! Waterproofing your own canvas fabric at home is totally doable and can save you a good chunk of change compared to buying it pre-made. Whether you’re crafting a new bag, a sturdy tarp, or just want to give your outdoor gear a bit more protection, this process gives you a tough, water-repellent material. Just remember to be patient with the curing process and keep up with maintenance, and your DIY waterproof canvas will serve you well for a long time.
Frequently Asked Questions
What’s the difference between regular canvas and waxed canvas?
Regular canvas is just plain fabric, but waxed canvas has a special coating of wax. This coating makes it tough against water and gives it that cool, slightly leathery look and feel.
Can I use any kind of wax to waterproof my canvas?
You can use different types of wax, like beeswax or paraffin. Often, a mix works best. Some people even use things like old candle wax, but make sure it’s clean and melts well. The goal is to create a barrier that water can’t get through.
Do I really need to heat the wax into the fabric?
Yep, heating the wax is pretty important. When you melt the wax into the canvas fibers with something like an iron or a heat gun, it really soaks in and creates a much better, longer-lasting waterproof seal. Just applying it cold won’t do as good a job.
My waxed canvas feels a little stiff. Is that normal?
Oh yeah, that’s totally normal! When the wax cools, the fabric can feel a bit stiff or even waxy. Don’t worry about it. As you use and bend the fabric, it will soften up over time and start to look more like aged leather.
How often do I need to re-wax my canvas?
It really depends on how much you use your canvas and how often it gets wet. For stuff that sees a lot of action or rain, you might need to touch it up every 6 months to a year. If it’s just for occasional use, it could last longer.
Can I wash my homemade waxed canvas?
It’s best not to put your waxed canvas in a washing machine or dryer. Seriously, it makes a huge mess and can ruin your appliances. For cleaning, just spot clean any dirty bits with a damp cloth or a special wax cleaner. If you must use soap, a tiny bit of dish soap might work, but be careful.