
Here are the main points to remember when you’re working with upholstery webbing and fasteners. Keep these in mind for a solid repair or build.
Key Takeaways
- Understand how webbing supports furniture and how fasteners hold it in place.
- Choose the right webbing material and fasteners that fit properly.
- Follow the specific upholstery webbing interlacing pattern for a secure weave.
- Make sure fasteners are firmly attached to the frame without damaging the webbing.
- Properly interlaced webbing provides good support and is easy to adjust or fix.
Understanding Upholstery Webbing And Fasteners
The Role Of Webbing In Furniture
So, what’s the deal with upholstery webbing? It’s basically the backbone of your comfy chair or sofa. Think of it as the support system that holds everything up, especially the cushions. Without it, your furniture would just sag and feel totally uninviting. It’s usually made from strong materials like jute or synthetic fibers, designed to handle weight and keep their shape over time. This webbing is stretched across the furniture frame, creating a solid base for the padding and fabric.
Introducing The Fastener Clip
Now, how do you keep that webbing in place? That’s where fastener clips come in. These little guys are pretty clever. They’re designed to grip the webbing securely without needing any screws or glue. The idea is that the clip grabs onto the webbing, and then a prong on the clip locks into a slot on the furniture frame. This makes assembly and even repairs a lot simpler. You don’t need special tools, which is a big plus if you’re doing this yourself. It’s a tool-free fastening method that really makes a difference.
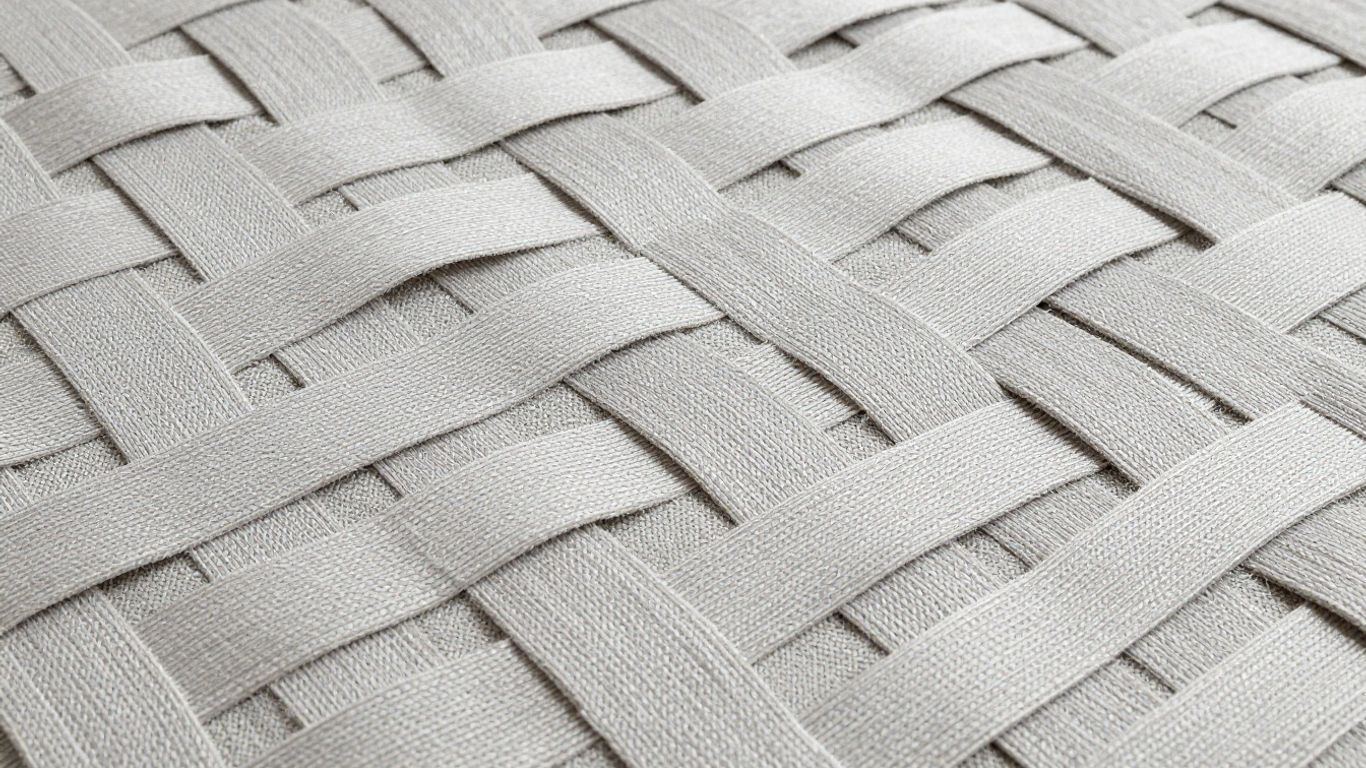
Key Components Of The Upholstery Webbing Interlacing Pattern
When you’re setting up the webbing, you’ll notice a specific pattern. It’s not just random. The webbing strips are interlaced, meaning they go over and under each other. This creates a strong, grid-like structure. The fastener clips are key to this. They have slots that the webbing threads through. The trick is that the webbing is usually a bit wider than the slots. This causes the webbing to flex slightly when it’s pushed into the slots. Because the webbing material is resilient, it pushes back, creating a tight grip on the fastener. This flex and grip is what keeps everything from slipping.
Here’s a quick rundown of what you’ll be working with:
- Webbing: The strong fabric strips that form the support base.
- Fastener Clips: The plastic or metal pieces that hold the webbing ends.
- Frame Slots: Openings in the furniture frame where the fastener clip’s prong locks in.
- Webbing Width vs. Slot Size: The slight difference that creates the secure, flexed fit.
The design of these fasteners is pretty neat. By making the webbing slightly wider than the slots it goes into, the material naturally grips the clip. This means no poking holes or using clamps, which just weakens the webbing over time. It’s a simple but effective way to get a strong hold.
Choosing the right kind of webbing is important for durability. For instance, 25mm beige C36 webbing is known for being tough and great for heavy-duty use, though you might need different types depending on your furniture project. There are lots of options out there for selecting the right upholstery webbing.
Preparing For Upholstery Webbing Interlacing
Before you start threading any webbing, it’s super important to get your materials sorted. This isn’t the part you want to rush, because if you mess this up, the whole webbing job might not hold up like it should. Think of it like prepping a canvas before you paint – you need a good foundation.
Selecting The Right Webbing Material
Not all webbing is created equal, you know? For furniture, you’re usually looking for something strong and a bit flexible. Polypropylene webbing is a popular choice because it’s tough, doesn’t stretch out too much, and can handle a good amount of weight. It’s also pretty resistant to things like mold and mildew, which is a bonus if your furniture might see some humidity. The width of the webbing is also a big deal; too narrow and it won’t support much, too wide and it might not fit your fasteners properly. You’ll often see webbing that’s around 2 inches wide, but always check what your specific furniture or repair project calls for. You can find good 25mm Black Polypropylene Webbing that works for a lot of different jobs.
Choosing Appropriate Fasteners
These little guys are what hold everything together. The most common type for interlacing is a clip that has slots. You feed the webbing through these slots, and then the clip attaches to the furniture frame. The key is that the fastener needs to grip the webbing securely without damaging it. Some fasteners have prongs that dig into the frame, while others might have a different locking mechanism. Make sure the fastener you pick is designed to work with the type of frame you have – usually metal tubing.
Ensuring Proper Webbing Width For Secure Fastening
This is where things get a little technical, but it’s really about getting a snug fit. The idea is that the webbing should be slightly wider than the slots in the fastener. When you push the webbing through, it gets a bit compressed or flexed. Because the webbing material is resilient, it wants to spring back to its original shape. This natural tension is what keeps the fastener from slipping off the webbing. It’s a clever design that means you don’t need glue or staples to hold the fastener onto the webbing itself. It’s all about that friction fit. Getting this right means your webbing will stay put, providing consistent support for years to come. It’s a core part of upholstery webbing techniques.
The goal is to create a system where the webbing is held firmly by the fastener through its own material properties and the design of the fastener slots. This tension is what prevents the webbing from loosening over time and ensures the integrity of the support structure.
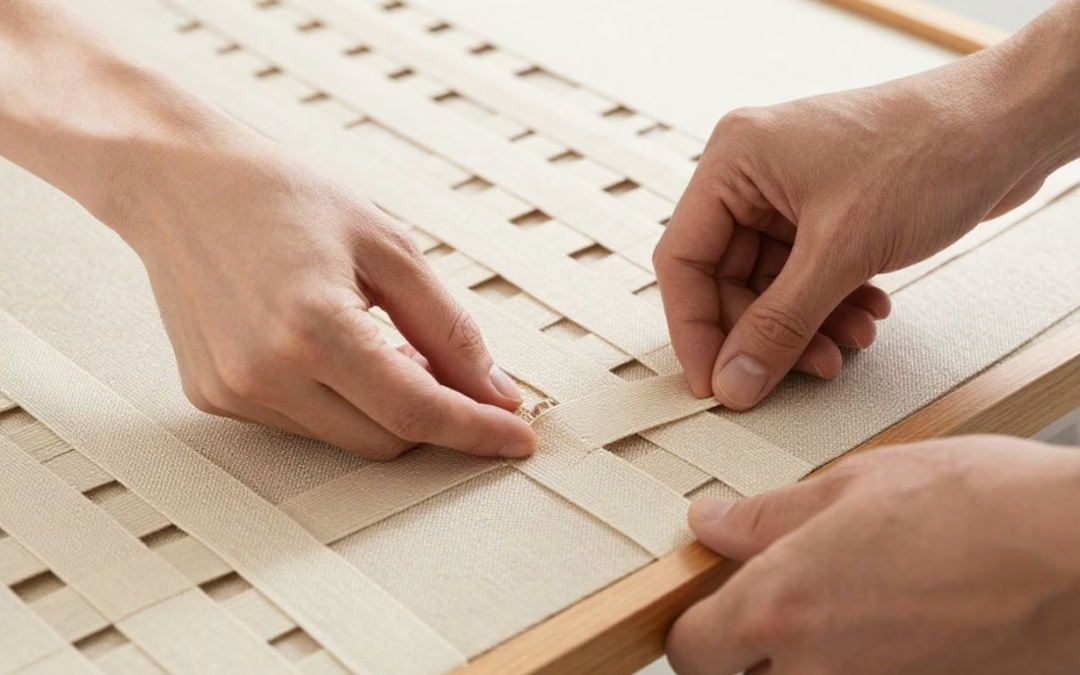
The Upholstery Webbing Interlacing Pattern Technique
Alright, let’s get down to the nitty-gritty of actually putting this webbing in place. It’s not just about slapping it on there; there’s a specific way to do it so it holds up. This technique is all about creating a strong, supportive surface for your cushions or whatever else needs it.
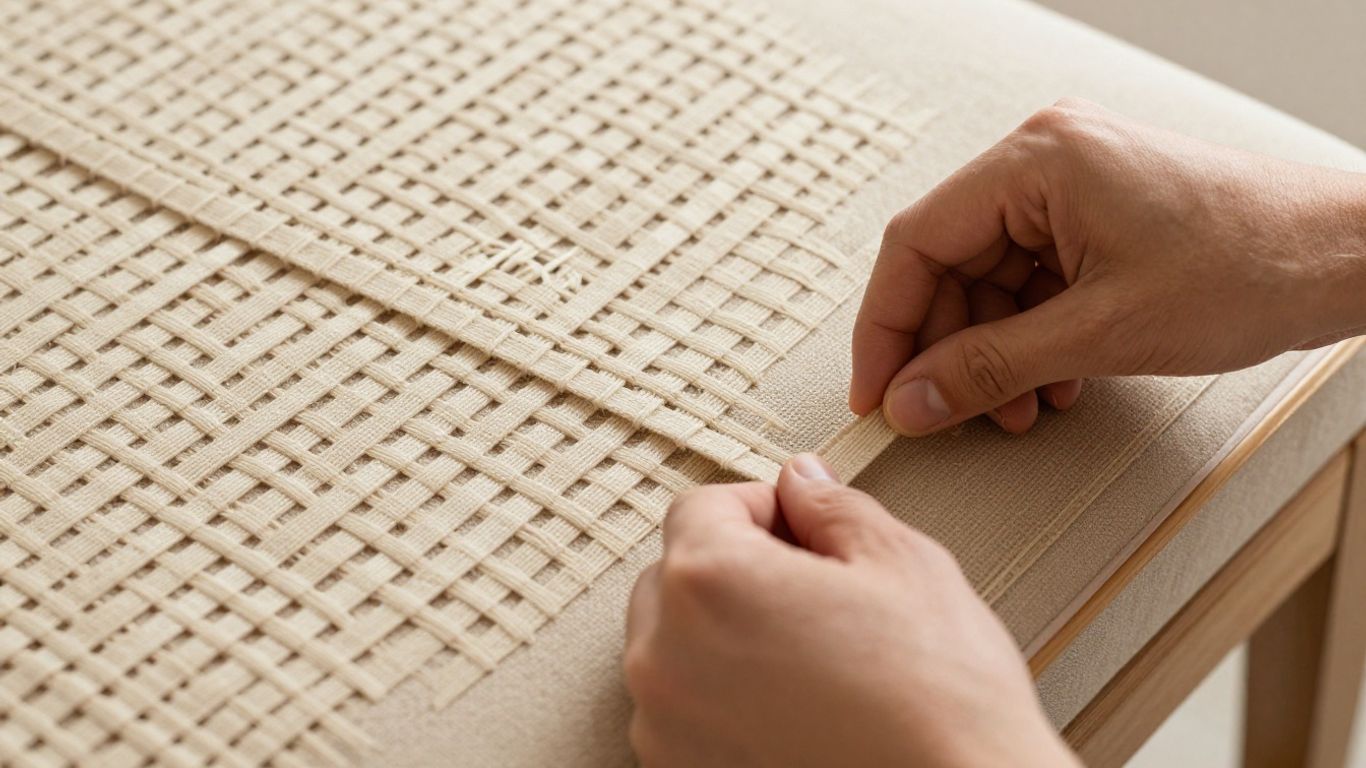
Threading Webbing Through Fastener Slots
First things first, you need to get the webbing through those little slots on your fastener clips. Think of the fastener clip like a tiny gatekeeper. You’ll take the end of your webbing, which is usually a flexible plastic like this twill tape, and feed it into the designated slots on the clip. Most clips have a couple of sets of opposing slots. You’ll thread the webbing through one set, and then usually back through another set on the same clip. It’s important to get it through both sets to really secure it.
Achieving A Secure Fit With Webbing Flexing
Now, here’s where it gets a bit clever. The trick to a really solid connection is that the webbing is actually a tiny bit wider than the space inside those slots. When you push the webbing through, it has to flex or bend slightly to fit. Because the webbing is made of a resilient material, it wants to spring back to its normal shape. This natural tendency creates a snug, friction-based hold on the fastener clip. It’s this slight buckling and tension that keeps the clip from sliding around on the webbing, and you don’t need any special tools or glue for this part.
Creating The Interlaced Upholstery Webbing Pattern
When you’re setting up the whole system, you’re not just laying down single strips. You’ll be interlacing them, kind of like weaving. This means one strip goes over, the next goes under, and so on, across the frame. This crisscross pattern distributes weight evenly and prevents the webbing from shifting too much. You’ll repeat this process, threading each new strip through its own set of fastener clips attached to the frame. The goal is a tight, uniform grid that provides consistent support. Learning these core upholstery techniques can really make a difference in the final look and feel of your furniture.
The key is to maintain consistent tension as you work. If one section is too loose while another is tight, you’ll end up with an uneven surface and potential weak spots. Take your time with each strip, ensuring it’s snug before moving to the next.
Here’s a quick rundown of the pattern:
- Start at one side of the frame.
- Thread the webbing through the fastener clip, making sure it’s snug.
- Stretch the webbing across to the opposite side, weaving it over or under the previous strips.
- Secure the other end with another fastener clip.
- Repeat for all remaining strips, alternating the over/under pattern.
Securing The Webbing With Fasteners
Alright, so you’ve got your webbing threaded and interlaced, looking pretty good. Now comes the part where we actually lock it all down. This is where those fastener clips really earn their keep. They’re designed to grab onto the webbing and then hook onto the furniture frame, holding everything taut.
Engaging The Fastener Prong With Frame Slots
This is the final connection. You’ll notice each fastener clip has a prong sticking out. This prong is meant to slide into a specific slot on the furniture’s frame. It’s usually a pretty snug fit, which is exactly what you want. You’ll take the end of the webbing, which is already secured within the fastener’s slots, and position the prong over the corresponding slot on the frame. Then, you just push it in. It should click or seat firmly. If you’re working with metal frames, these slots are often pre-made. For wooden frames, you might need to install specific hardware, like the kind used for re-webbing lawn chairs.
Adjusting Tension For Optimal Support
Once the prong is in place, you might need to fine-tune the tension. The beauty of these fasteners is that they often allow for some adjustment. You can usually slide the fastener along the webbing a bit, or sometimes even reposition the webbing itself within the clip, to get that perfect tightness. You don’t want the webbing to be so loose that it sags, but you also don’t want it so tight that it’s straining the fasteners or the frame. It should feel firm and supportive when you press on it.
Here’s a quick rundown of what to aim for:
- Firmness: The webbing should feel solid, not bouncy or loose.
- Evenness: All the interlaced strips should have similar tension.
- No Sagging: When weight is applied, the webbing shouldn’t drop significantly.
The Importance Of A Tool-Free Fastening Method
One of the best things about many modern upholstery webbing systems is that they’re designed to be tool-free. This means you don’t need any special tools to attach the fasteners to the webbing or the frame. The clips themselves are engineered to grip the webbing through friction and tension, and the prongs are shaped to easily engage with frame slots. This makes the whole process much simpler, especially if you ever need to do repairs. You can just slide the fasteners to adjust tension or replace a damaged clip without needing a screwdriver or hammer. It’s a big step up from older methods that required clamping or even puncturing the webbing, which could weaken it over time. This approach is common with modern furniture fasteners that use specific stainless steel designs.
The clever design of these fasteners means the webbing itself creates the grip. By making the webbing slightly wider than the slots in the clip, it naturally flexes and bulges when inserted. This flex creates a secure, friction-based hold without any need for glue, screws, or staples. It’s a simple yet effective way to keep everything in place.
Maintaining And Repairing Upholstered Furniture
So, your favorite chair is looking a little sad, huh? Maybe the webbing has gone slack, or a fastener clip seems to have given up the ghost. Don’t toss it out just yet! A lot of times, these issues are totally fixable without calling in the big guns. It’s usually about getting things back in place or swapping out a small part.
Troubleshooting Loose Webbing
When webbing starts to sag, it’s usually because the tension has eased up. This can happen over time with regular use. The good news is that often, you can just readjust the webbing. If the fasteners are still holding strong, you might be able to slide them a bit to retighten the strap. It’s like giving your furniture a little tune-up.
- Check the Fasteners: First, see if the clips are still firmly attached to the frame. Sometimes they just need a gentle push back into place.
- Readjust Webbing: If the clips are secure, try to pull the webbing taut and see if you can slide the fastener along the frame to a tighter position. This might take a bit of wiggling.
- Consider Replacement: If the webbing itself is frayed or broken, or if the fasteners are damaged, it’s time for new parts. Replacing webbing is a pretty straightforward job if you’ve got the right materials.
Replacing Damaged Fastener Clips
Fastener clips are pretty tough, but they can break or get bent out of shape. If one of yours is kaput, you’ll need to replace it. The cool thing about these clips is that they usually don’t require any special tools to swap out. You just need to get the old one off and pop a new one on.
Replacing a broken fastener clip is often a tool-free job. You simply unhook the old clip and attach a new one, which then secures the webbing in place. This makes repairs much simpler for the average person.
Simplifying Furniture Repair With Secure Fasteners
One of the best things about the interlacing webbing system is how easy it makes repairs. Unlike older methods that might have involved staples or screws that could damage the frame, these clips are designed for simple attachment and detachment. This means you can often fix things yourself without needing a workshop full of tools. If you’re looking to refresh older pieces, looking into couch upholstery services might be a good idea, but for minor fixes, this system really shines. It’s a smart design that keeps furniture looking good and functioning well for longer, and if you’re in a bind, you can always find local upholstery professionals to help out.
Here’s a quick rundown of why this system is great for repairs:
- No Special Tools Needed: Most repairs, like re-tensioning webbing or replacing a clip, can be done by hand.
- Frame Friendly: The clips attach to the frame without drilling or clamping, so you won’t damage the furniture structure.
- Easy Replacement: If a clip breaks, you can usually just slide the old one off and snap a new one into place.
- Webbing Integrity: The clips hold the webbing without piercing it, so the webbing material stays strong.
Conclusion
So, that’s the lowdown on getting your upholstery webbing interlaced just right. It might seem a bit fiddly at first, but once you get the hang of the upholstery webbing interlacing pattern, it’s actually pretty straightforward. Using the right fasteners and making sure everything is snug without being too tight is key. This method not only makes your furniture look good but also makes it super easy to fix later on if anything comes loose. No special tools needed, which is always a bonus. Happy upholstering!
Frequently Asked Questions
What exactly is upholstery webbing?
Think of upholstery webbing as the strong straps that go under your cushions or backrest on furniture. They’re like a supportive net that holds everything up and keeps it from sagging. It’s usually made of tough plastic or fabric.
Why is the interlacing pattern important?
The way the webbing strips cross over and under each other, the upholstery webbing interlacing pattern, is like building a strong grid. This pattern spreads out the weight evenly, so no single spot gets too much pressure. It makes the whole seat or back feel firm and last longer.
What are fastener clips for?
Fastener clips are little gadgets, usually plastic, that grab onto the webbing and then attach to the furniture frame. They’re what keep the webbing from sliding around. The cool part is that many types don’t even need screws or tools to put on.
How do I know if I have the right size webbing?
You want webbing that’s just a tiny bit wider than the slots in your fastener clips. When you push the webbing through, it should be snug, maybe even slightly bending or buckling. This makes it grip the clip really well without slipping.
Can I fix loose webbing myself?
Yep, you sure can! If your webbing is loose, you can often just slide the fastener clips along the frame to tighten it up. It’s usually a tool-free job, which makes fixing furniture much simpler than you might think.
What happens if a fastener clip breaks?
If a fastener clip breaks, don’t panic. Since they’re designed to be easy to use, you can usually just slide the old one off and put a new one on the webbing. You don’t need to be a furniture expert to swap them out.